
Chroma Key
The chroma key tool in Imerge Pro is among the best in the world for processing green screen photography. It makes stunning results almost effortless for most images, while at the same time providing intuitive yet powerful adjustments to bring even the most problematic images into line. Full details of all of its controls are available on the chroma key page of this manual.
Color Difference Key

- Screen color: Choose the mode used to remove the backdrop.
- Automatic: Examines every pixel, and determines what color will remove the largest area of the image. In most cases, this effectively removes the backdrop automatically. In rare cases where the wrong color is selected, choose the correct color manually.
- Green: Removes chroma green from the image, for green screen photography.
- Blue: Removes chroma blue from the image, for blue screen photography.
- Red: Removes chroma red from the image, for red screen photography. Red should usually not be used for human subjects, but can be effective for products or other objects.
Matte adjustment
- Removal: Increasing this setting will remove a larger range of color from the image. If parts of your backdrop are still visible, raise the removal value.
- Soften removal: Targets areas of the image that are nearly transparent, and pushes them toward greater transparency.
- Detail: Targets areas that are nearly opaque and restores them to full opacity, thereby restoring edge detail that has been partially removed.
- Crush transparency: Removes artifacts remaining in the transparent areas, to clean up the key.
- View matte: Toggle this option on to view the matte created by the key as a grayscale image, which is useful for precisely dialing in optimum results.
Spill suppression
- Removal: Targets the screen color within the key result, and suppresses it to eliminate color spill.
Light Wrap
Light wrap adds realism to your composites by simulating light sources in the background wrapping around the edges of your subject.
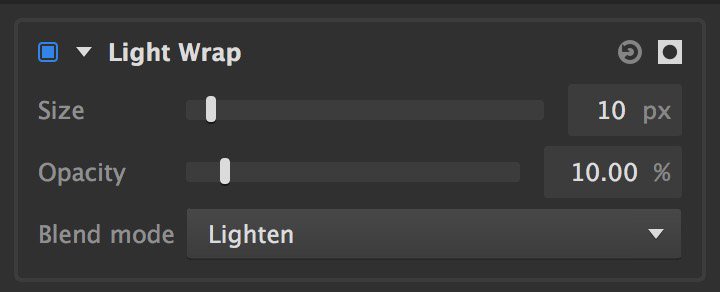
- Size: Defines the width, in pixels, of the swath of the edge that will be affected.
- Opacity: Sets the opacity of the light wrap effect. Increase the value for a more powerful effect.
- Blend: Select the blend mode used to combine the light wrap with the keyed image. See blend modes for more information.
Luminance Key
Luminance key is useful for removing white or black backgrounds, where there is not sufficient color data to use color-based keying tools.
The interface of the luminance key effect contains two tabs, available at the top of the effect’s controls:
- Basic: Here is where you make the primary adjustments to your key.
- Refine Key: If you need to fine tune the results further than the Basic settings allow, this tab gives you full control over the range of colors that are removed.
Each will be discussed in detail in the sections below.
Basic

- Channel to key: Select the channel of the image that you wish the key to be based on. The results will be subtly different, and its best to test each one to determine which works best for any specific image.
- Luminosity: Colors are mapped to grayscale values based on their perceived brightness to the human eye.
- Lightness: Colors are mapped to grayscale values based on their brightness relative to a similarly illuminated white.
- Intensity: Colors are mapped to grayscale values based on the average of the RGB components.
- Key type: Select which luminance range should be removed.
- Remove darker: Extracts black and shadow areas from the image.
- Remove brighter: Extracts white and highlight areas from the image.
- Threshold: Sets the edge softness of the tonal selection. Low threshold values will create a harder edge to the selection, while higher values will soften the edge and create more semi-transparent areas.
- Tolerance: Adjusts the tonal range that will be removed. Higher values will remove a larger range.
- View matte: Toggle this option on to view the matte created by the key as a grayscale image, which is useful for precisely dialing in optimum results.
Color Match Background
- Enabled: Enabling this option auto-adjusts the colors in your subject, to match the colors of the image below and improve the realism of your composite.
- Strength: Changes the intensity of the color match adjustment.
Light Wrap
- Enabled: Enabling light wrap will alter the edges of the result of your key, based on the colors present in the background. Specifically in cases where the background is bright, this creates a more realistic result, but light wrap is also useful in various other situations.
- Size: Defines the width, in pixels, of the swath of the edge that will be affected.
- Opacity: Sets the opacity of the light wrap effect. Increase the value for a more powerful effect.
- Blend: Select the blend mode used to combine the light wrap with the keyed image. See blend modes for more information.
Refine Key

The first four controls in the Refine Key tab are duplicates of controls in the Basic tab. they are duplicated here so you can easily adjust them while editing the Refining tools, without needing to switch back and forth between tabs repeatedly.
- Channel to key: Select the channel of the image that you wish the key to be based on. The results will be subtly different, and its best to test each one to determine which works best for any specific image.
- Luminosity: Colors are mapped to grayscale values based on their perceived brightness to the human eye.
- Lightness: Colors are mapped to grayscale values based on their brightness relative to a similarly illuminated white.
- Intensity: Colors are mapped to grayscale values based on the average of the RGB components.
- Key type: Select which luminance range should be removed.
- Remove darker: Extracts black and shadow areas from the image.
- Remove brighter: Extracts white and highlight areas from the image.
- Threshold: Sets the edge softness of the tonal selection. Low threshold values will create a harder edge to the selection, while higher values will soften the edge and create more semi-transparent areas.
- Tolerance: Adjusts the tonal range that will be removed. Higher values will remove a larger range.
- Clip Blacks: Quickly removes areas from your background that remain after keying, to clean up the key. Increasing this setting pushes areas that are slightly semi-transparent into complete transparency.
- Clip Whites: Quickly restores areas in your subject that are partially removed by the key. Decreasing this setting pushes areas that are slightly transparent into complete opacity.
- Gamma: Adjusts the midpoint between values that are unaffected and values that are completely removed. Negative values increase the range of color that is completely removed. Positive values reduce the range of colors that are removed, allowing for a more precise key.
- View Matte: Toggle this option on to view the matte created by the key as a grayscale image, which is useful for precisely dialing in optimum results.
Matte Cleaner
Refine and adjust the results of your keying effects in a variety of ways, to improve the edges of the key.

- Feather: Softens the edges of the key, by blurring the matte by the number of pixels selected.
- Smooth edge: Smooths the edge of the key by averaging out small variations in the edge. Any changes in the edge smaller than the selected value will be smoothed out.
- Shrink/Expand: Move the edge of the key inward (negative values) to remove edge pixels, or outward (positive values) to add additional pixels to the edge.
- View matte: Toggle this on to view the greyscale matte created by the key, or off to view the full color image.
Remove Color Matting
Eliminates halos from the edges of composited elements where the background has been removed. When a composited element has unwanted color around the edges, you can use this tool to remove that color, while still retaining transparency in those edge areas.
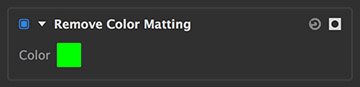
- Color: Click the swatch to open a color picker and select the color you want to remove from the image.
Remove Stock Background
For stock images shot on a black or white background, this tool makes it easy to remove those backgrounds.

- Background: Choose whether Black or White is removed from the layer.
- Channel: Choose the channel used to determine what area is removed.
- Max RGB: Uses the highest value among the RGB channels to calculate removal.
- Luminance: Calculates the removal based on the luminance channel.
- Average RGB: Averages the red, green and blue values, and uses the result to calculate the removal.
- Balance: Adjusts how much of the tonal range is removed.
- View Matte: Reveals, on the Viewer, the matte created by the removal calculations.
Spill Removal
Color spill occurs when light is reflected off of the backdrop and onto your subject, resulting in an unwanted color cast. This tool removes the unwanted color spill from your image.
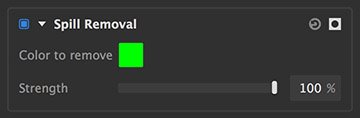
- Color to remove: Click the swatch to open a color picker and select the color you want to remove from the image.
- Strength: Adjusts the intensity of the adjustment used to remove the color spill.
Need more help with this?
Don’t hesitate to contact us here.