
You can choose the format used when you export your images. Each format has advantages and disadvantages, and settings you can adjust to control the compression used in the exported image. These settings are accessed in the Output section of the Batch screen, and are explained in detail here.
JPEG
JPEG is a popular 8-bit format that offers good image quality and small file sizes. It does not support alpha channels or transparency. While the image quality is visually acceptable, the JPEG format does discard a lot of data when compressing the image, and it therefore offers more limited capabilities for editing.
- Quality: Adjusts the amount of compression applied to the image. Higher percentages give better image quality, lower percentages give smaller file sizes.
- Progressive: Toggles between Baseline or Progressive JPEG. Progressive is generally better for internet use. When progressive is disabled, the image loads from the top down, one line at a time. This is the standard, or baseline, JPEG option. Enabling Progressive loads the entire image at once, first at low resolution then at full resolution as soon as possible.
- Save for web: Adds specific metadata to the exported image which is useful for internet use. If you are exporting images for use on the internet, toggle this option on.
- Matte Color: Specify the color that will be used to fill in areas of alpha transparency. Click the color swatch to open a color picker and select any color of your choice.
TIFF
TIFF is a lossless editing format which supports 8-bit or 16-bit color.
- Bit depth: Select between 8-bit or 16-bit color for the exported image. 16-bit creates larger file sizes, but stores more colors for higher quality.
- Color profile: Select the profile to be assigned to the exported images.
- None: No color profile is assigned.
- sRGB: sRGB is the most common color profile, and is typically used for general viewing of digital images.
- Adobe RGB (1998): Adobe RGB is an alternate color profile which maps colors slightly differently than sRGB.
- ROMM RGB: A popular wide gamut profile designed specifically for photography, which supports a larger range of colors.
PNG
PNG is a high quality format that supports transparency.
- Bit depth: Select between 8-bit or 16-bit color for the exported image. 16-bit creates larger file sizes, but stores more colors for higher quality.
- Color profile: Select the profile to be assigned to the exported images.
- None: No color profile is assigned.
- sRGB: sRGB is the most common color profile, and is typically used for general viewing of digital images.
- Adobe RGB (1998): Adobe RGB is an alternate color profile which maps colors slightly differently than sRGB.
- ROMM RGB: A popular wide gamut profile designed specifically for photography, which supports a larger range of colors.
- Transparency: Toggle this option on to embed transparency data in the exported image. Toggle it off to fill transparent areas with black and reduce the file size.
- Compression: Choose the level of compression used by the exported file. Each provides a different balance of file size and speed.
- None / Fastest: Largest file size, fastest loading and saving.
- Large / Fast: Slightly smaller files, which load and save a bit slower than Uncompressed.
- Small / Slow: A good balance of file size and performance speed.
- Smallest / Slowest: Smallest file size, slowest loading and saving.
EXR
Exports to the OpenEXR format, the primary format used by ILM and many major visual effects studios. It is a high quality format that is able to store HDR (high dynamic range) color information. EXR format will flatten the entire canvas to a single layer on export.
HDR
Exports to the RGBE format, an HDR (high dynamic range) format which uses Red, Green and Blue channels, plus a fourth Exponent channel.
Save
The current format and compression settings can be saved as a preset for quick access in the future. Full details of creating and using export presets are available on the export presets page.
Create a preset
- Select the format you need, and adjust the quality and compression settings as desired.
- Select Save from the format menu.
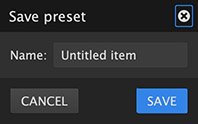
- In the dialog that opens, enter a Name for the new preset.
![]()
- Click the Save button to create the preset.
- The new preset will now be listed in the Format menu, ready for future use.
Using presets
All user created presets will be listed in the formats menu. Select any preset from the menu, and the format and quality settings it contains will be applied.
Need more help with this?
Don’t hesitate to contact us here.