
The composite shot timeline has several tools arranged around its outer edge. Many of these are similar to those found in the editor.
The Time Ruler
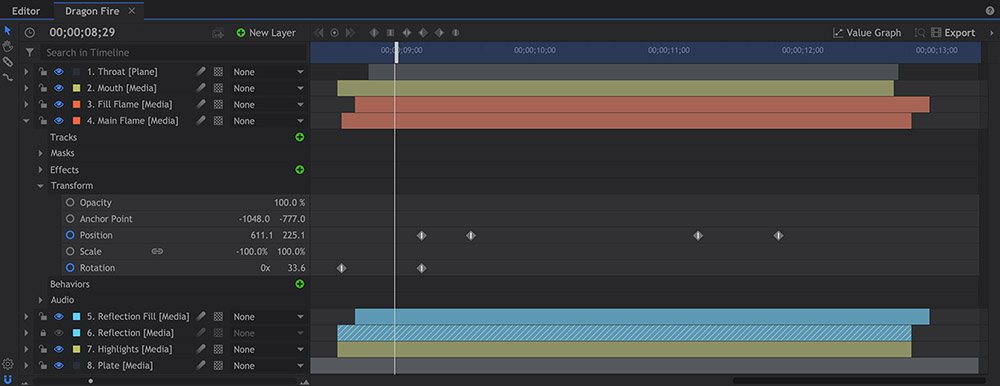
Along the top of the timeline is the time ruler, representing the duration of your project. Clicking on the time ruler will move the playhead, which defines the current frame, to the location of the click. The frame located at the playhead’s new location will be displayed in the Viewer.
You can also click and drag on the playhead itself.
To jump to a specific time, simply type it into the time display at the top-left. The time display can be switched between timecode and frame count using its right-click menu.
Scaling and Panning the Timeline
The timeline can be scaled using the zoom bar, so that you can either zoom out to see the composite shot’s entire contents or zoom in to focus on a specific area and perform fine frame-by-frame work.
When zoomed in you can then use the scrollbars or the Hand tool to pan the timeline left and right.
- Pressing Home on your keyboard will scroll the playhead to the first frame of the timeline.
- Pressing Ctrl+Home will auto-scroll the timeline to the current playhead position.
Searching Your Layers
Composite shots can contain large numbers of layers, each of which contains many properties. You can use the Search box at the top of the timeline to find specific layers or specific properties within complex timelines.
Setting the Work Area
The work area is represented by the light gray bar running along the time ruler. It defines a limited portion of the timeline, for two main purposes.
- Looped Playback: Specify a particular portion of your timeline for looped playback.
- Export: Define a portion of the timeline to be exported, rather than exporting the entire timeline.
The work area defaults to the timeline’s entire duration, but can be adjusted using three methods.
- Time Ruler: Drag the ends of the work area on the time ruler to reposition them on any frame of your choice. Holding the Alt key and dragging on the work area will move it without changing its duration.
- Keyboard: Position the playhead on any frame, and press I to set the In Point to that frame, or press O to set the Out Point to that frame. * Pressing the P key will set the work area to encompass the contents of your timeline.
- Viewer Buttons: Click the Set In Point button to set the In Point to the frame where the playhead is currently located, or click the Set Out Point button to set the Out Point to the frame where the playhead is currently located.
Keyframes ![]()
![]()
![]()
At the top left of the timeline are the keyframe buttons.
Keyframes are used to store changes to settings on particular frames. For example, on frame 10 a video could be set to full opacity and then on frame 20 it could be set to 50% opacity. This would be stored as two keyframes, one on frame 10 and one on frame 20. Between frames 10 and 20 the video would become gradually more transparent.
The two arrow buttons are used to jump between keyframes for the currently selected property.
The circle button in the center is used to turn keyframes on and off on the current frame for the currently selected property. If a keyframe is present on the current frame a dot is displayed in the middle the circle.
Additional buttons control whether the timing of individual keyframes is linear, constant, or smoothed.
See Animating with Keyframes to find out more.
Exporting
You can export any timeline, in whole or in part, to create a new video file from its contents. On the top right of each timeline is the Export button. Clicking it reveals two options. Which one you click determines what portion of the timeline is added to the Export Queue.
- IN/OUT Area: Exports only the work area of your timeline. The work area is defined by the In and Out points you set, as detailed above.
- Contents: Exports the entire contents of the timeline. If your timeline extends beyond the video it contains, any empty frames on the end will not be included in the export.
The In/Out area can also be adjusted directly in the Project panel of the Export Screen. See Exporting for full details.
Adjusting Properties ![]()

You can open a composite shot’s properties at any time by clicking the gear icon in the bottom-left of the panel.