
Background
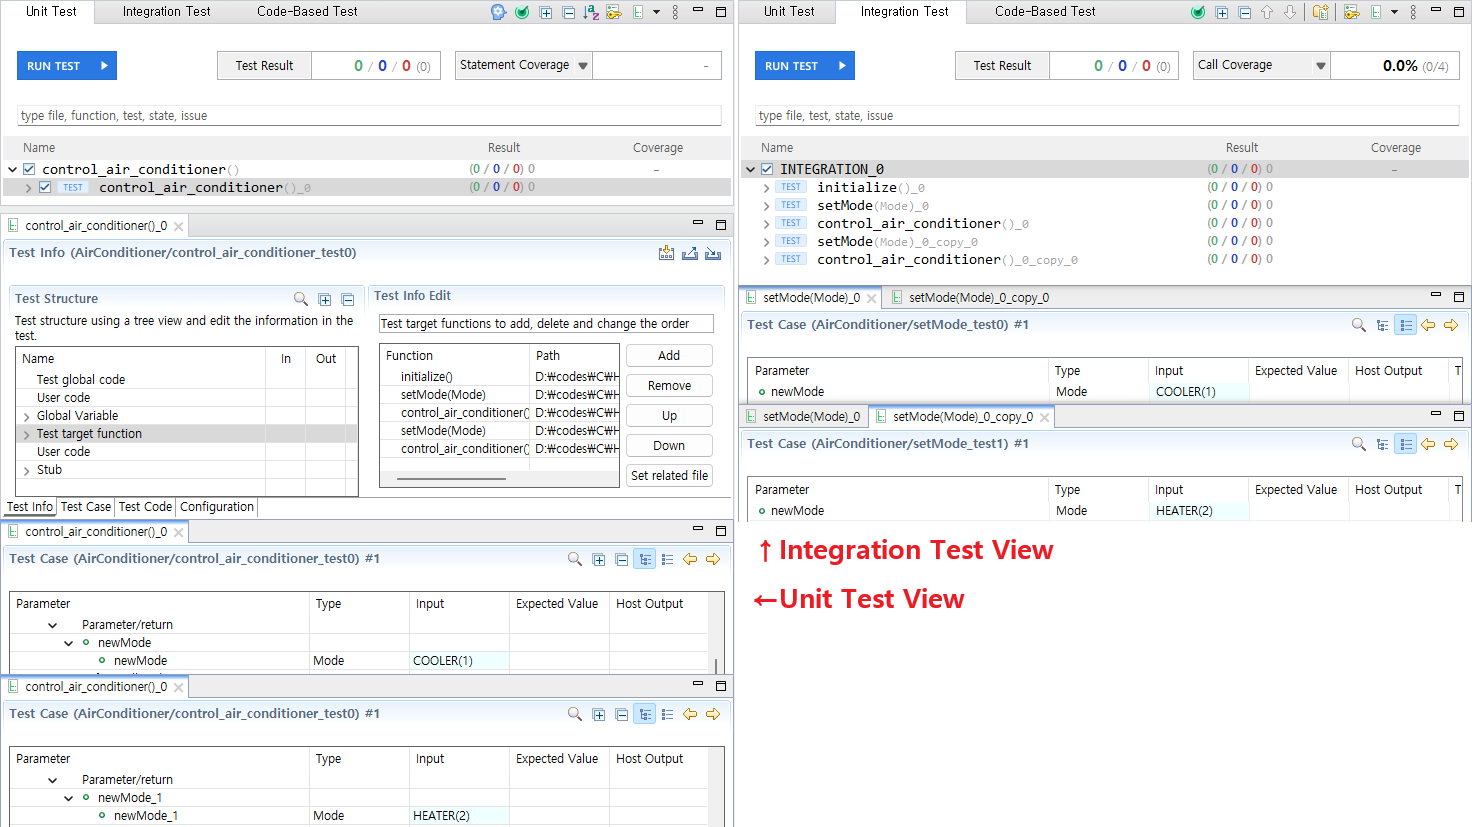
CT provides several ways to design integration tests. While [Integration Test View] is commonly used, [Unit Test View] also provides feature to design and execute the same integration test scenarios.
Advantages of using [Unit Test View] for integration tests:
- Works similarly to [Integration Test View] adding test target functions.
- Allows consecutive execution of multiple functions in one test, reducing redundant tasks such as linking stubs.
- Debugging features available within [Unit Test View].
Designing and Running Integration Tests in [Unit Test View]
This guide explains how to design and run integration tests using a simple air conditioner example.
Define Integration Test Scenario
The source code and integration test scenario to be used as an example are as follows:
Example source code
void heating() { /* very complex code... */ }
void cooling() { /* very complex code... */ }
void fanOnly() { /* very complex code... */ }

typedef enum {
	OFF, COOLER, HEATER, FAN_ONLY
} Mode;
Mode mode = OFF;

void control_air_conditioner() {
    switch(mode) {
	case COOLER:
		cooling();
		break;
	case HEATER:
		heating();
		break;
	case FAN_ONLY:
		fanOnly();
		break;
	}
}

void initialize() {
	mode = FAN_ONLY;
	control_air_conditioner();
}

void setMode(Mode newMode) {
	mode = newMode;
}
Integration Test Scenario:
- Call
initialize()to perform initialization. - Call
setMode()to change the mode toCOOLER. - Call
control_air_conditioner()to apply the setting. - Call
setMode()to change the mode toHEATER. - Call
control_air_conditioner()twice in a row to apply the setting.
Designing and Running the Test
Now, we will design the above scenario in [Unit Test View].
- Step 1: Determine Test Target Functions and Order
- Step 2: Create Unit Test
- Step 3: Configure Test Scenario
- Step 4: Enter Test Data
- Step 5: Maintain Test Case Context
- Step 6: Run the Test
Step 1: Determine Test Target Functions and Order
Determine the functions to call and their order according to the scenario:
| Action | Function | Step |
|---|---|---|
| Perform initialization | initialize() | 1 |
| Change mode to COOLER | setMode(COOLER) | 2 |
| Apply air conditioner setting | control_air_conditioner() | 3 |
| Change mode to HEATER | setMode(HEATER) | 4 |
| Apply air conditioner setting twice | control_air_conditioner() control_air_conditioner() |
5 6 |
Step 2: Create Unit Test
After determining the test target functions and their execution order in the previous step, proceed to create the corresponding unit tests. Choose the function that is either the first to be executed or the central one in the scenario. control_air_conditioner() is selected to create the unit test.
Step 3: Configure Test Scenario
- Go to [Test Editor] > [Test Info Tab].
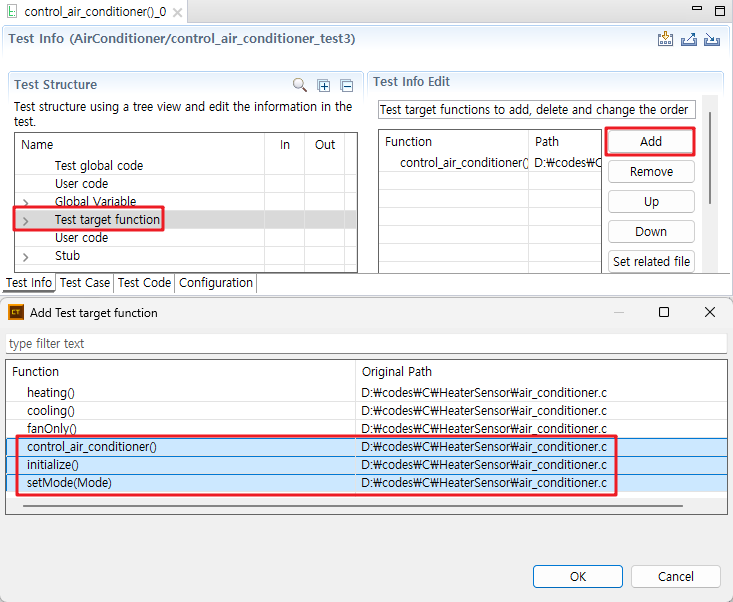
- Add the functions to be called in [Test target function]. Use
Ctrl+ClickorShift+Clickto multi-select.
![]()
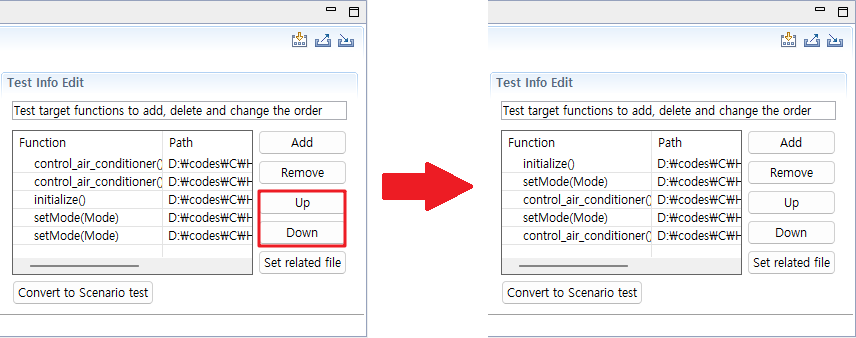
- Use [Up]/[Down] buttons to arrange them in the defined order.
![]()
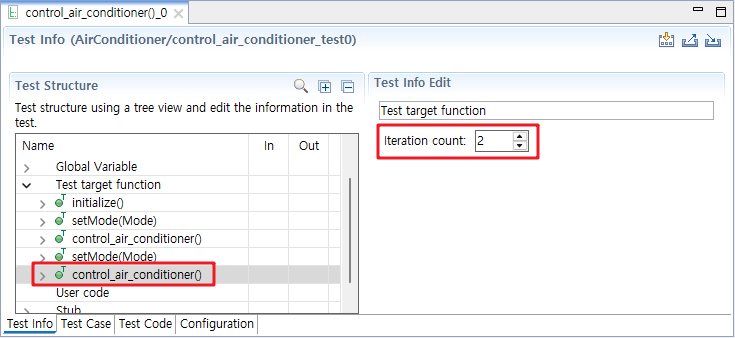
- Where the same function is called multiple times like
scenario 5. Apply air conditioner setting twice, adjust [Iteration count] for the test target function. In this case, set the [Iteration count] of the secondcontrol_air_conditioner()function to2.
![]()
- Save the test.
Step 4: Enter Test Data
- Go to [Test Editor] > [Test Case Tab].
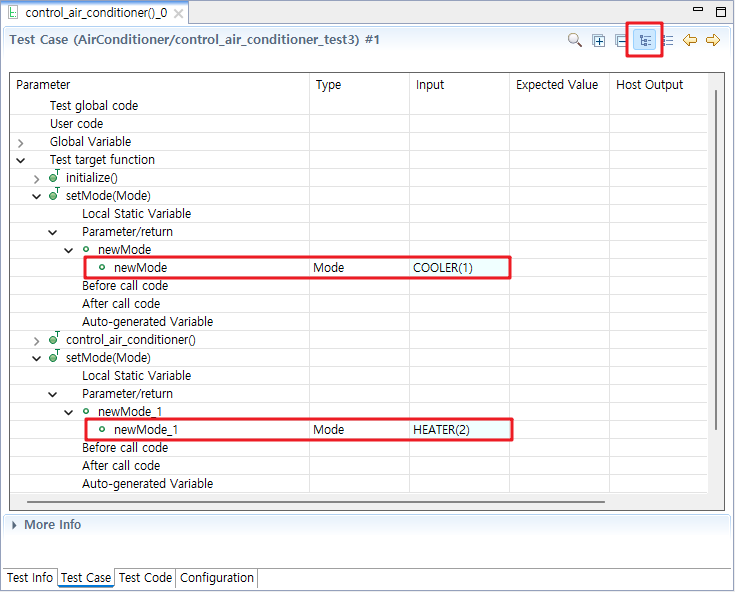
- Enter parameters for the
setMode(Mode)function according to the scenario.
![]()
- For the first
setMode(Mode)function, enterCOOLERas the input value for thenewModeparameter. - For the second
setMode(Mode)function, enterHEATERas the input value for thenewMode_1parameter, and then save the changes.
- For the first
Step 5: Maintain Test Case Context
In [Integration Test View], test cases are executed while maintaining context between them. To do the same in unit tests, go to [Test Editor] > [Configuration Tab] and check [Maintain test case context].

- What is [Maintain test case context]?
- By default, CT executes each test case independently without affecting others. The [Maintain Test Case Context] option changes this behavior. When enabled, the program state at the end of one test case is preserved and carried over to the next test case without re-initialization.
For example, when testing a function that increments a global variable a (initially 0) by 1:
- Context not maintained:
aremains 1 after each test case - Context maintained:
aaccumulates (1 → 2 → 3…) across test cases
- Context not maintained:
Step 6: Run the Test
Click [Run Test] button to run the integration test scenario written as a single unit test. This unit test will behave the same way as the integration test shown below.
Conclusion
[Unit Test View] and [Integration Test View] each have their own characteristics.
| Unit Test View | Integration Test View |
|---|---|
| Provides various debugging features such as [Debug in VS Code], [Inspect Debug Info], etc. | Allows different stubs to be applied for each test |
| By linking stubs only once, they can be applied to the entire integration test scenario | Enables test design by dividing functions, making the coverage of each unit test clearly distinguishable |
| Provides the same functionality as integration testing through features like [Add Test Target Function] and [Maintain Test Case Context] | Allows test design by dividing functions and checking reports for each executed function as separate unit tests |
Both views satisfy integration test requirements. Choose the appropriate method based on your testing purpose and structure.
Need more help with this?
Don’t hesitate to contact us here.