
To change the date format, the date, the time, the temperature measurement unit or the alarm settings or to read the preset alarm limits please proceed as follows:
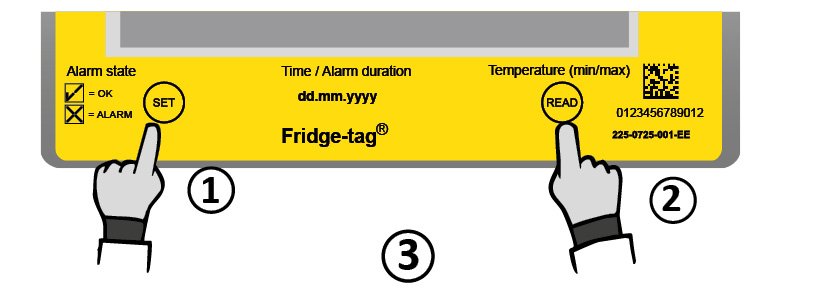
- Press and hold SET …
- … then press READ shortly …
- … then release both buttons simultaneously.
SET DATE (internal sensor) is now displayed on the screen.
OUTSIDE (external sensor) is now displayed on the screen.
You entered the menu mode and may choose which entry to see or change.
You can access the following 4 menus:
OUTSIDE (external sensor): first screen, shows the temperature measured with the internal sensor of the Fridge-tag (normal ambient temperature).
Press READ once to get to SET DATE.
SET DATE (internal sensor): Configuration with internal sensor,
SET DATE is directly shown.
- SET DATE: change date and/or time settings
- READ CONF: read the alarm settings
- CELS FAHR: change the temperature unit
- SET CONF: change the alarm settings (only if enabled in factory setting)
Use the READ button to scroll through the menu.
Use the SET button to access the corresponding menu.
Access the menu “SET DATE”
External sensor: The display shows OUTSIDE. Press READ until the display shows SET DATE.
Internal sensor: The display shows the menu “SET DATE”. Press SET to access the menu to adjust the date format, date or time settings. Then follow the steps as described in the chapter Setting the date.
Note: Time and date adjustments have no effect on the alarm records. Adjustments can only be made for date and time settings and for changing the temperature measurement unit. Once the device is activated, it cannot be stopped anymore. The number of adjustments during the same day is unlimited. After an adjustment has been made, the Fridge-tag will be locked for 24 hours from the following midnight (e.g. changes on 15 September., device locked from 00:01 am on the 16 September until 00:01 am on the 17 September). This is for security reasons.
Access the menu “READ CONF”
The display shows SET DATE (internal sensor), OUTSIDE (external sensor). Press READ until the display shows READ CONF. Then press SET to access the menu to read the current alarm configurations. First the display check appears. Then press READ repeatedly to scroll through the preset alarm parameters.
Access the menu “CELS FAHR”
The display shows SET DATE. Press READ until the display shows CELS FAHR. Then press SET to access the menu to change the temperature measurement unit. To change the measurement unit (Celsius/Fahrenheit) press READ until the display shows the desired sign (°C/°F). Press SET to confirm the measurement unit.
Access the menu “SET CONF”*
The display shows SET DATE. Press READ until the display shows SET CONF. Press SET to access the menu to change the alarm configurations. To change the alarm limits (duration or temperature) please proceed as described in the chapter Setting the alarm limits.
*Changes of the alarm limits are only possible for devices which are programmed with this feature.