
Akkadian Contact Manager is deployed as a virtual appliance on VMware ESXi versions 5.x and above. The steps below will help guide you through the process of deploying the virtual appliance; however, you should understand VMware or contact your VMware administrator for assistance.
- Download the latest Akkadian Contact Manager OVA to a location accessible by the vSphere client.
- From the vSphere client select Deploy OVF Template from the File menu.

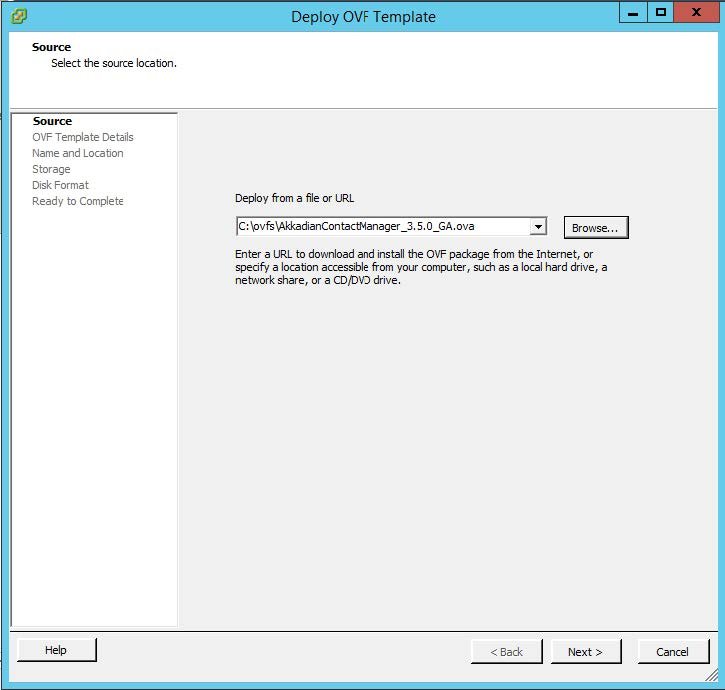
- Select the OVA from computer or network location and click Next to continue.
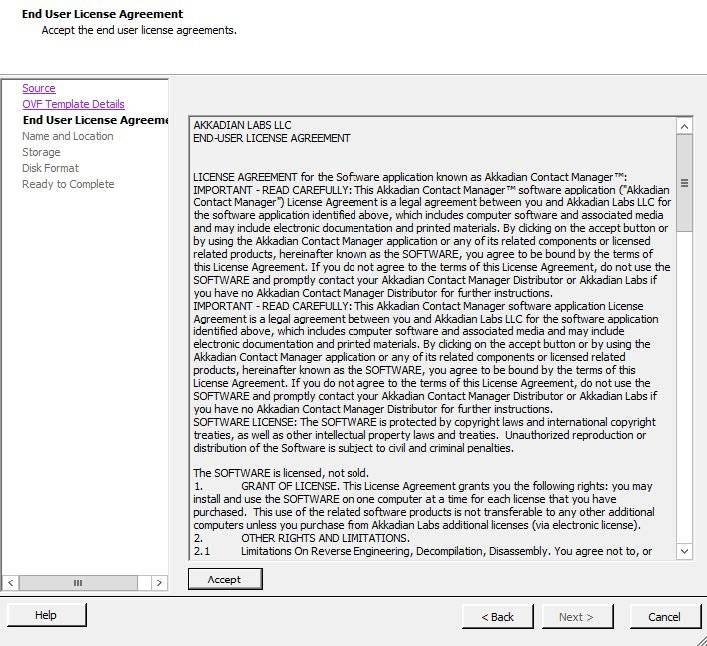
- Review the License Agreement and click Next to continue.
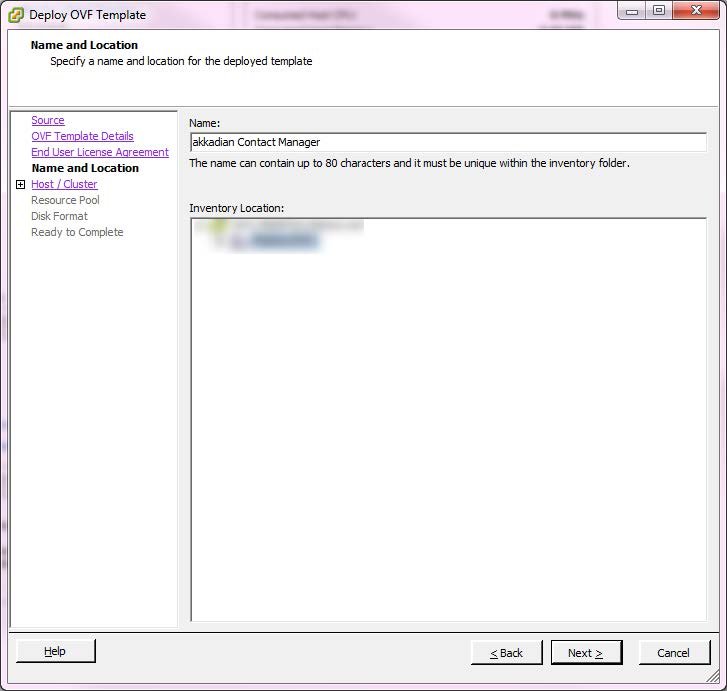
- Specify the name and location for the VMware machine and click Next to continue.
- Specify the VMware Host / Cluster and click Next to continue.
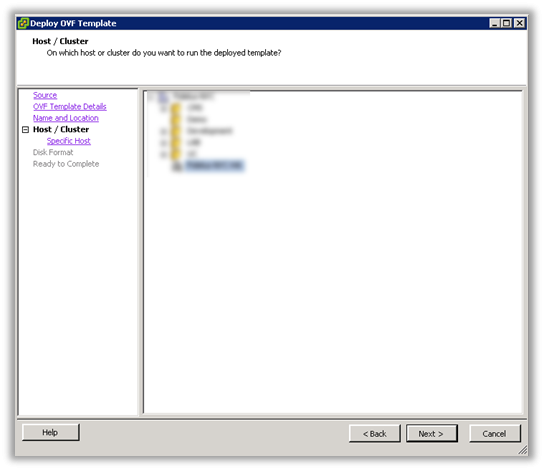
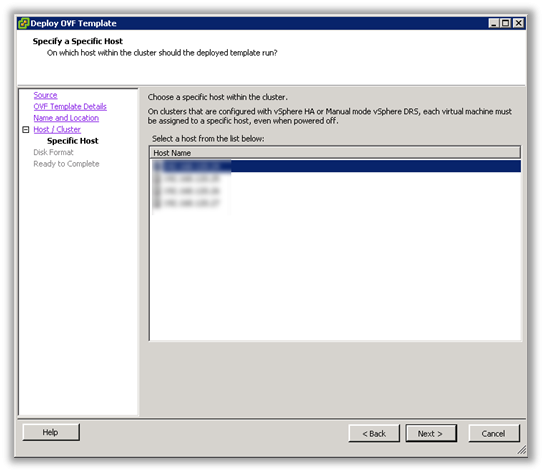
- Specify a host within the cluster and click Next to continue.
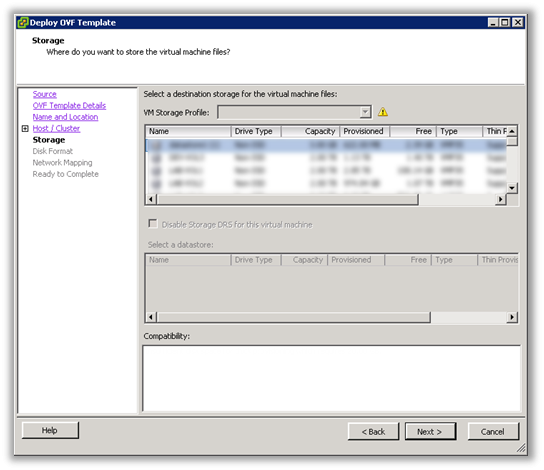
- Specify the storage location for the virtual machine and click Next to continue.
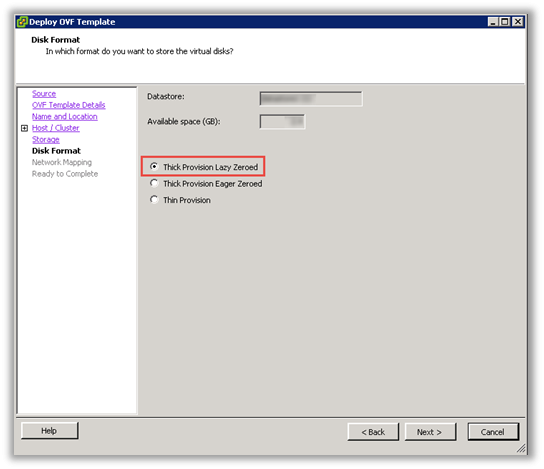
- Select Thick Provision Lazy Zeroed and click Next to continue.
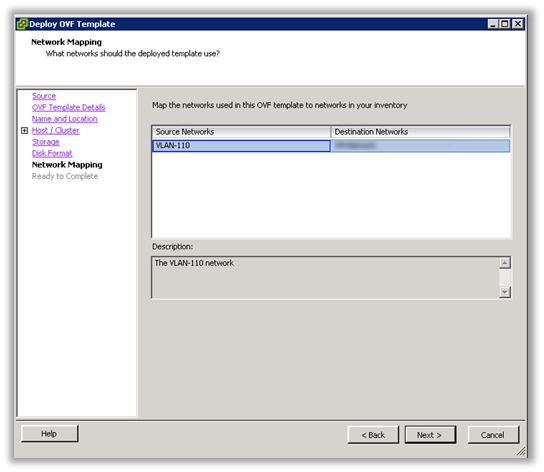
- Select the Destination Network for the virtual machine and click Next to continue.
- Verify the virtual machine settings. The initial OVA deploys with 2 vCPU and 8GB Memory. Depending on your system requirements, you may need to adjust the virtual CPU and Memory settings.
Please refer to the virtual machine requirements to determine the appropriate settings for your environment.
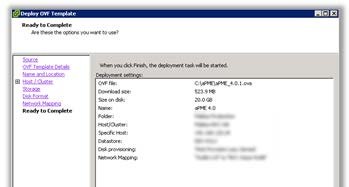
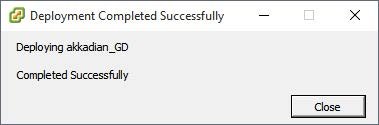
- Click OK to complete the deployment.
- To adjust the virtual machine CPU and Memory, locate the newly deployed virtual machine in vCenter, right click on the virtual machine and select Edit Settings.

- On the Hardware tab, select CPU and adjust the setting to provide the required number of cores for your environment.

- After adjusting the CPU, click on Memory and adjust the settings to provide the required resources for your environment. When completed, click OK to commit the changes.
- Power on the virtual machine and proceed.
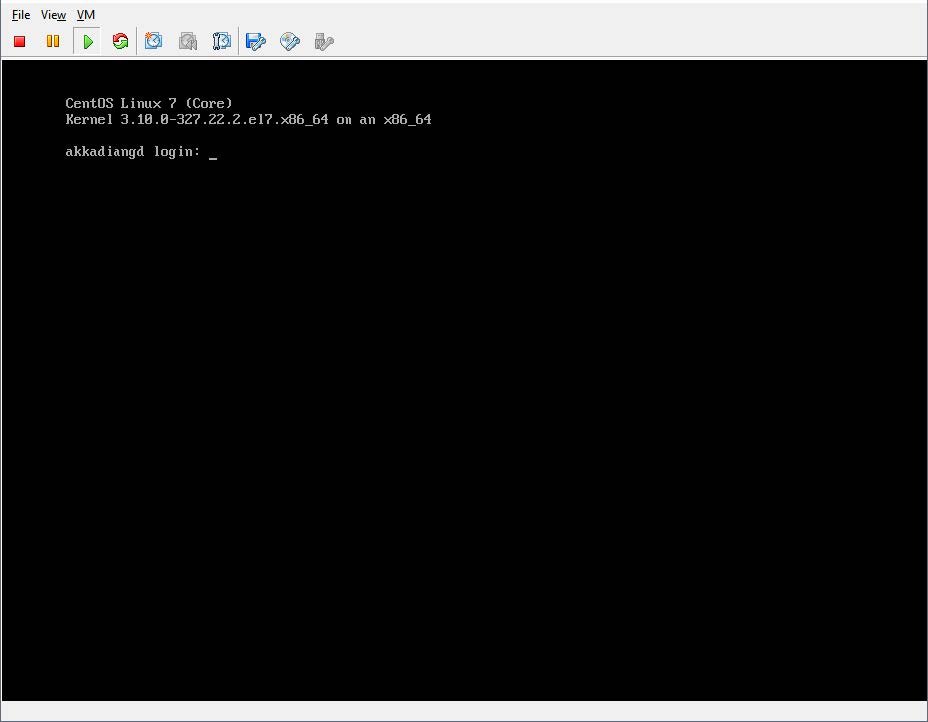
- Locate the virtual machine in vSphere and open a console.
- When the server boot process is complete, the system will arrive at a login prompt. Login using:
| Username | akkadianuser |
|---|---|
| Password | akkadianpassword |
- From the Akkadian Appliance Manager main menu, select option 1 to Configure Network.
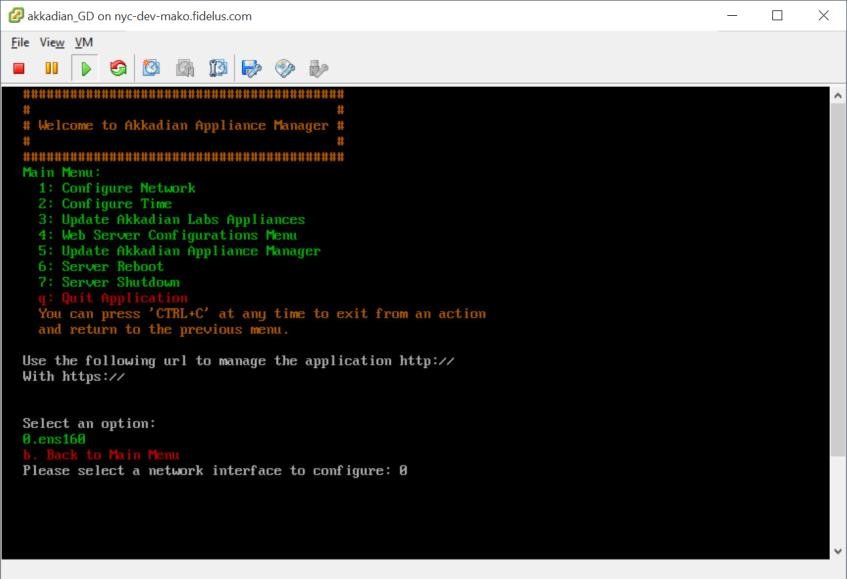
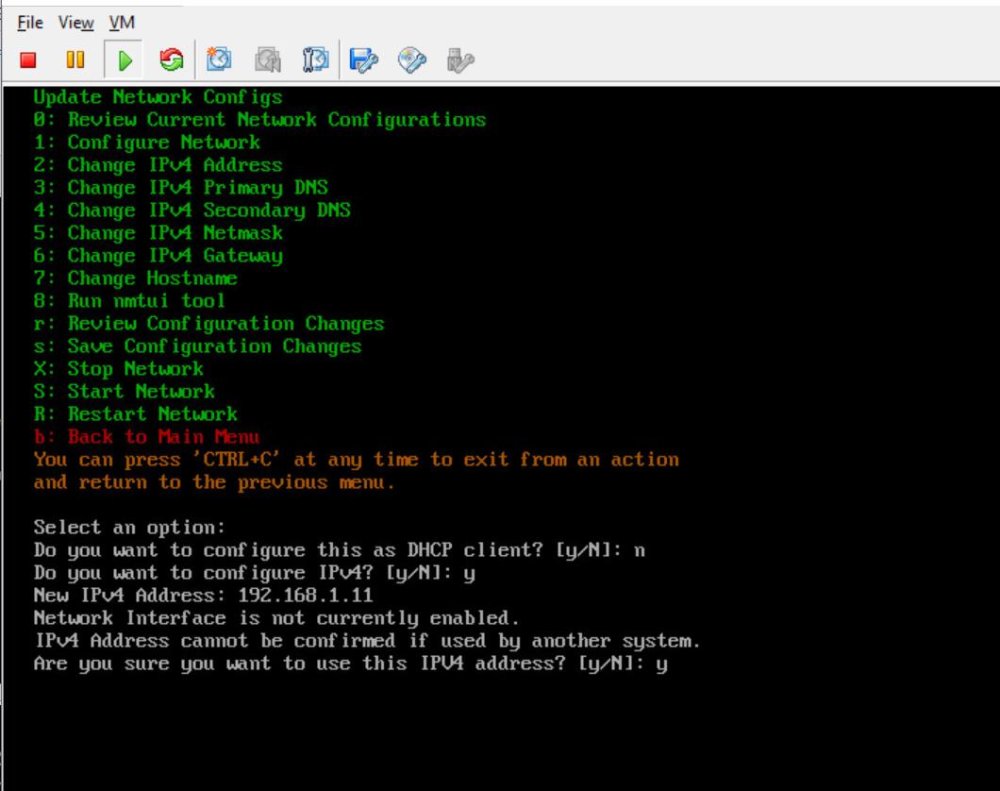
- Select option 1 to configure the network setting.
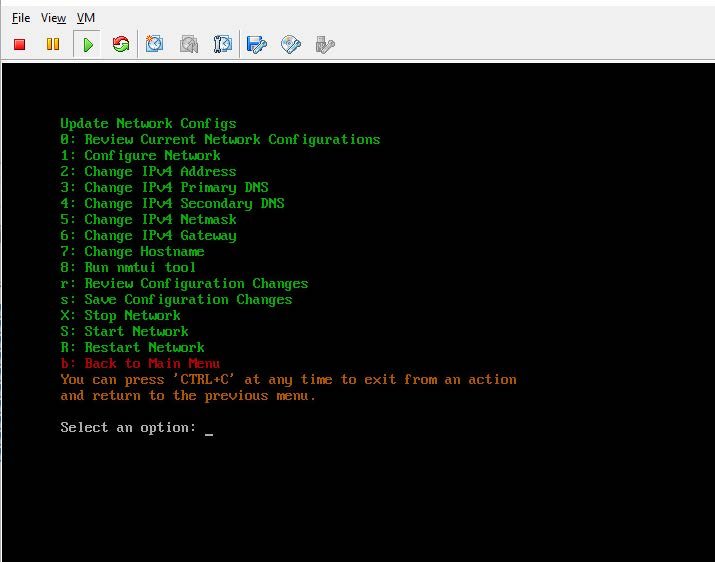
- Follow the prompt to configure the network settings for your environment.
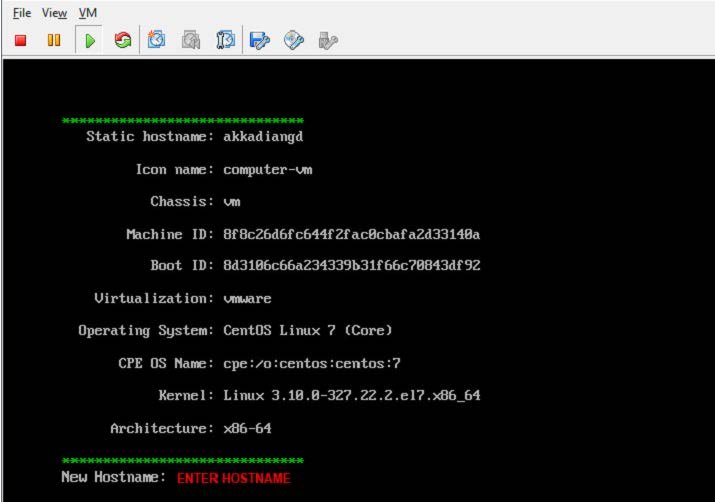
- Select option 7 from the network configuration menu to configure the hostname. It is recommended the hostname is entered using the fully qualified domain name.
Example – Contact Manager.yourdomain.com
- Optionally you may configure the server time by selecting option 2 form the configure network menu.
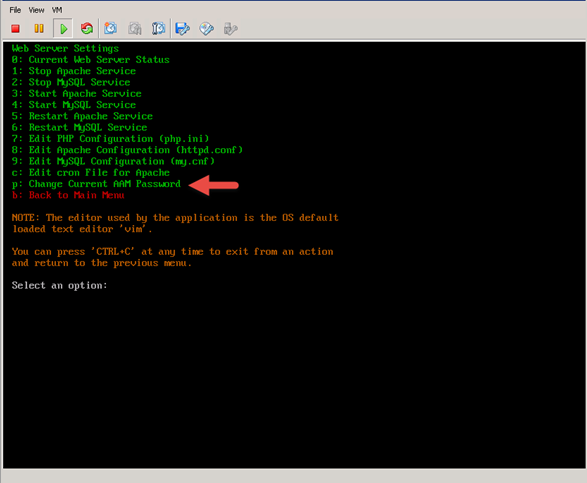
- It is recommended you change the default Akkadian Appliance Manager password by selecting option 4 (Web Server Configuration Menu) from the main menu and then selecting “p” (Change Current AAM Password).
- When all configurations are complete, select “s” from the network configuration menu to save the configuration and restart the network.
- From the main menu, select Reboot Server to finalize the configuration.
- When the system returns to the login prompt, the Akkadian Contact Manager virtual appliance deployment is complete and can be accessed by going to https://{Server IP or Name}/agd.
Post your comment on this topic.