| |
This is the Add icon. |
| |
This is the Show members icon. |
| |
This is the Hide members icon. |
| |
This is the Edit icon. |
| |
This is the Delete icon. |
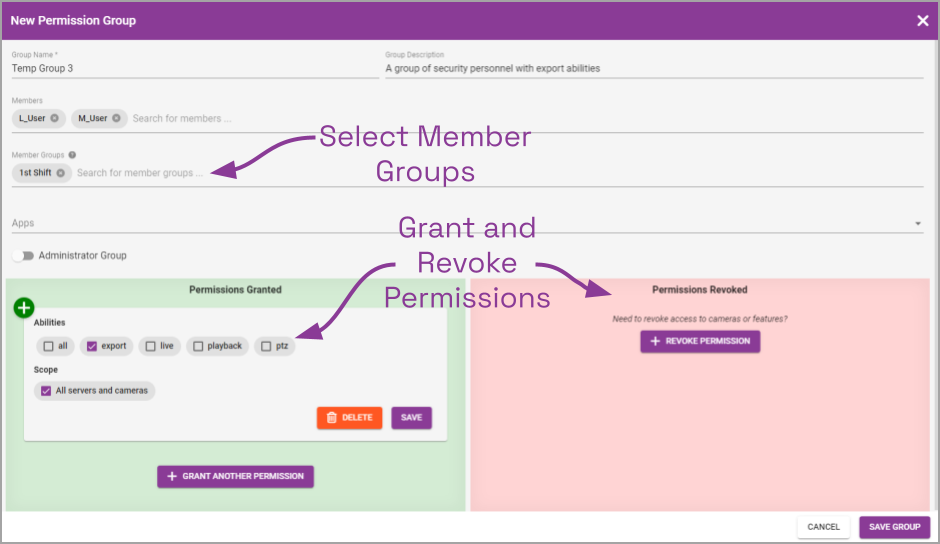
- Click the Add Permission Group button in the top-right corner of the Permission Group list. A New Permission Group screen will open.

- Enter a name and a description for the new Permission Group in the Group Name and Group Description fields.
- To add member Permission Groups to this Permission Group, click on Search for member groups to open a drop-down list of existing Permission Groups. Find and click on a Permission Group. As soon as you select a Permission Group, another list will appear so you can make another selection (if needed).
- Press Esc if you don’t need to make another selection.
- To remove a Permission Group, click the X to the right of the Permission Group name.
- To assign specific, limited permissions for this Permission Group, use the Permissions Granted and Permissions Revoked features.
- After all of the permissions are set, press the Save Group button.
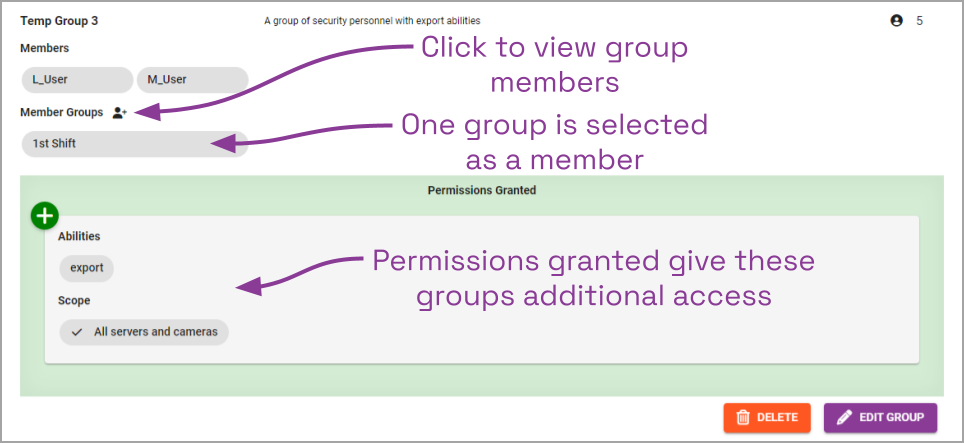
- When the Permission Group appears in the Permission Groups list, click the Show Members icon to display all of the users in the member Permission Group.
- Click the Hide members icon to conceal them.

Permission Groups may contain a combination of individual members, member Permission Groups, and external groups.


Post your comment on this topic.