
| |
This is the Smart Search filter icon. Click this icon to turn Smart Search on at the Player. |
| |
This is a handle icon. Click and drag this icon to change the shape of the motion filter region. |
| |
This is a new handle icon. Click this icon to add another handle to the motion filter region for reshaping. |
| |
This icon indicates that Smart Search is in edit mode. Click this icon to exit edit mode. |
| |
This icon indicates that Smart Search is in edit mode and that one motion filter region has been added. |
| |
Click this Delete icon to remove all of the motion filter regions on the selected Player. |
| |
This icon indicates that one motion filter region has been added (but Smart Search is not in edit mode). |
Beginning in version 22.12, Orchid Recorder supports the new Smart Search feature. This feature allows you to select one or more specific areas of a Player to monitor for motion. These targeted motion events will appear in blue at the top of the Timeline Bar so they are easy to identify.
- To begin using Smart Search, position the mouse over the Player; this will activate the Smart Search icon.
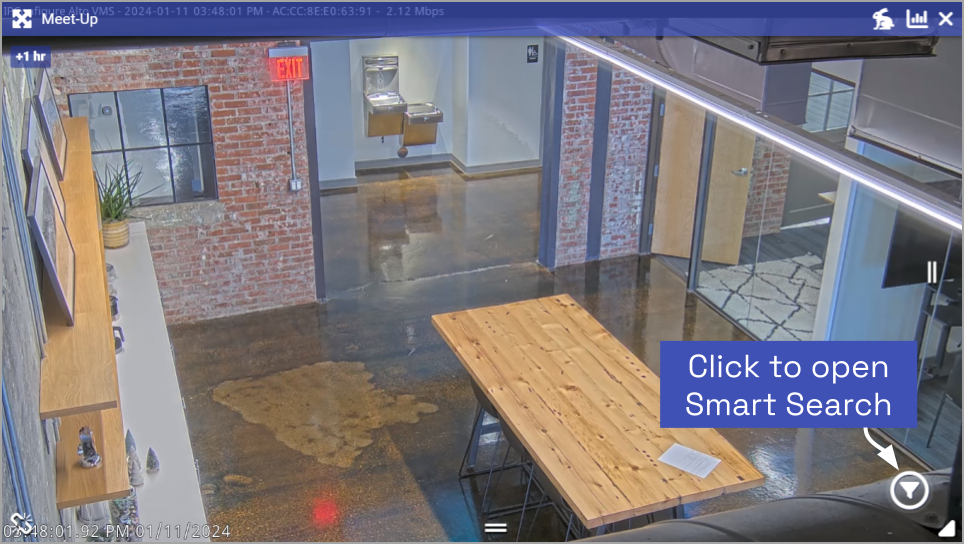
- Click on the Smart Search icon (in the lower-right corner of the Player). This will initiate edit mode (which provides you with some instructions).
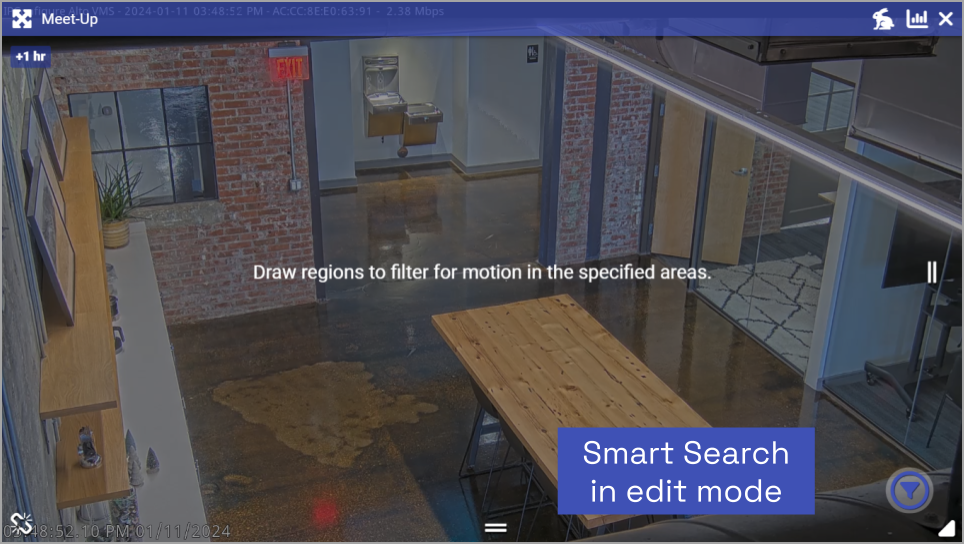
- Now use your mouse to click and drag a rectangle around the area you want the system to monitor for motion.
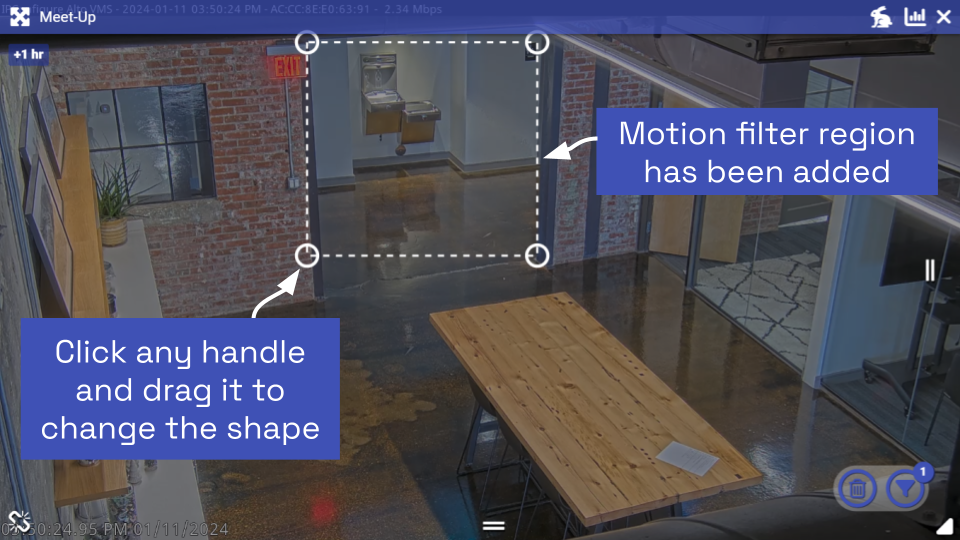
The Smart Search icon will now indicate that you have added one motion filter region to the Player.
Beginning in version 23.3, Orchid Recorder allows you to modify the initial motion filter region rectangle, so you can create a custom shape. Notice the circular handles at each corner of the rectangle? These may be used to change the shape of the motion filter region. You even have the ability to add and remove handles. Let’s take a look.
- To adjust the shape of the region, click and drag any of the circular handles.

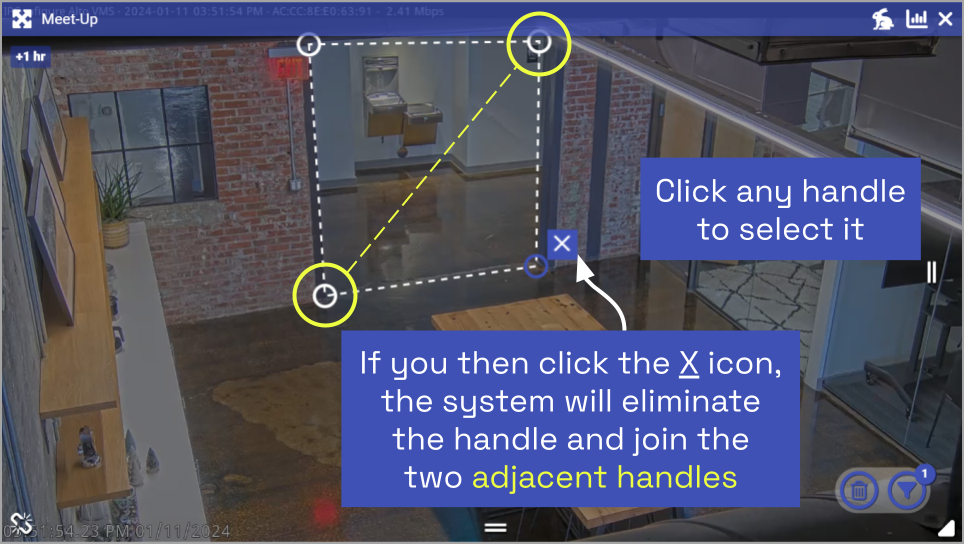
- In the image above, notice that one of the handles is highlighted. The X icon will allow you to remove this handle. If you remove a handle, the adjacent handles will be joined, resulting in a dramatic change to the motion filter region (as indicated in the image below).
- To enable additional options, first click inside the motion filter region to highlight it.
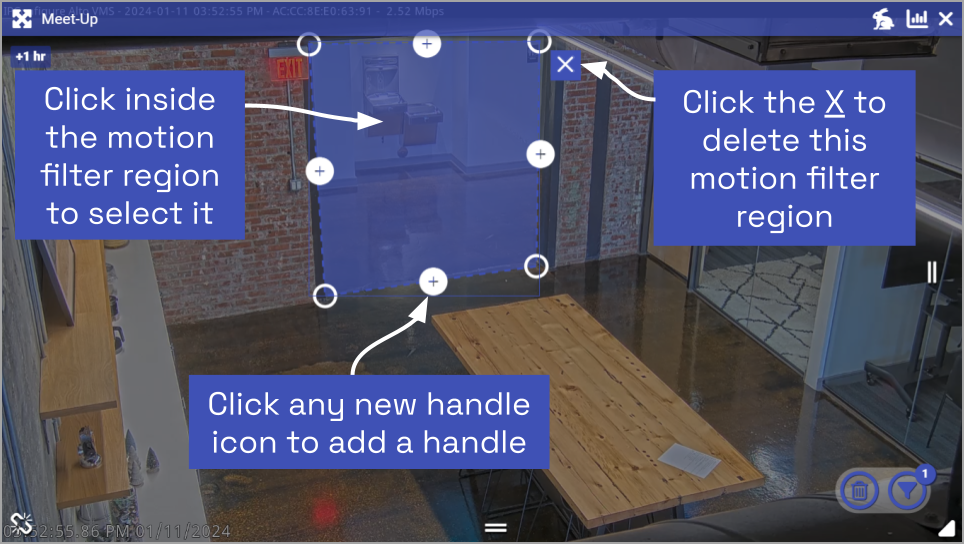
- Click on any of the new handle icons to add a handle. You may then use the new handle to reshape the region.
- Click the X icon to remove the entire motion filter region.
- Click outside of the motion filter region to keep it as is.
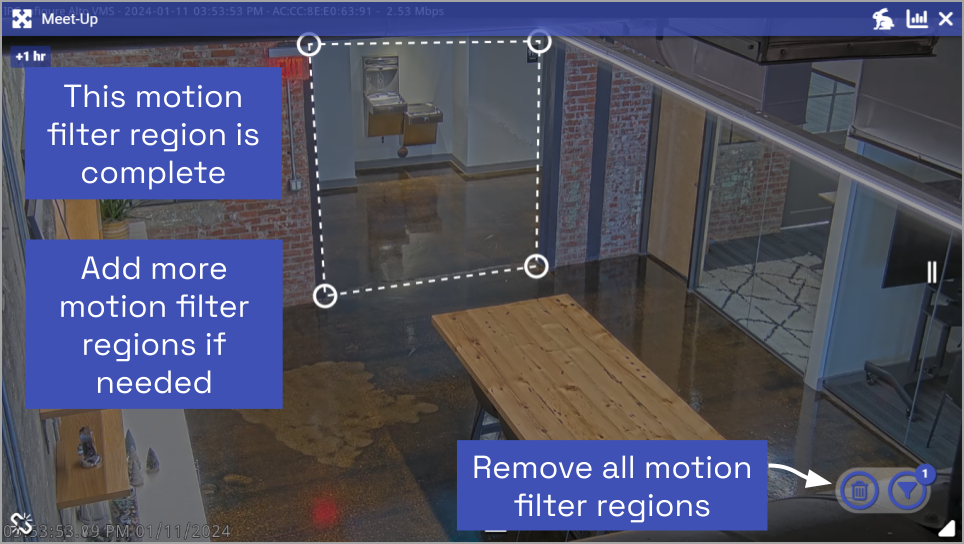
- Add more motion filter regions, if needed. The Smart Search icon will indicate how many regions you have added to the Player.
- If you want to remove all of the motion filter regions, click the Delete icon.
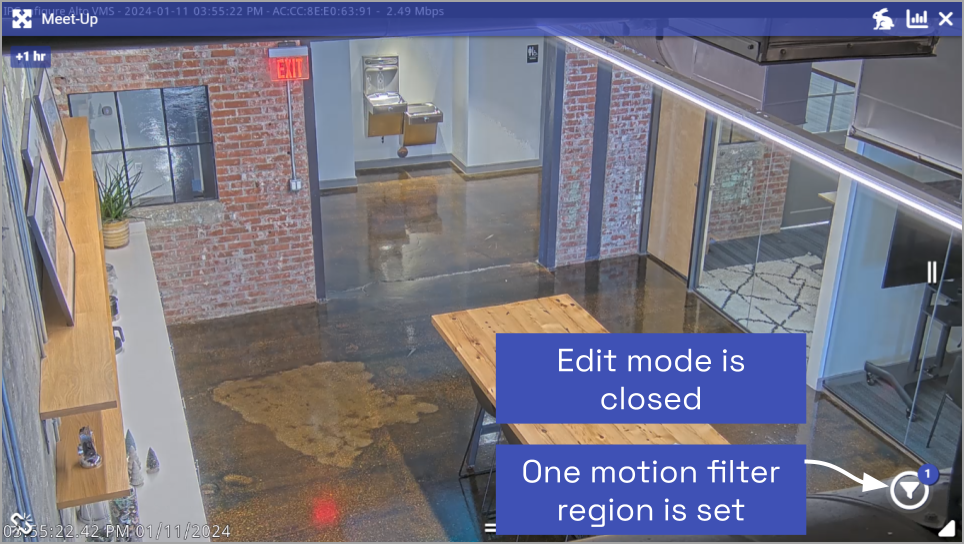
- When you are done adding motion filter regions, click on the Smart Search icon to close editing mode. The Smart Search icon will return to white and will indicate how many motion filter regions have been set up (if any).
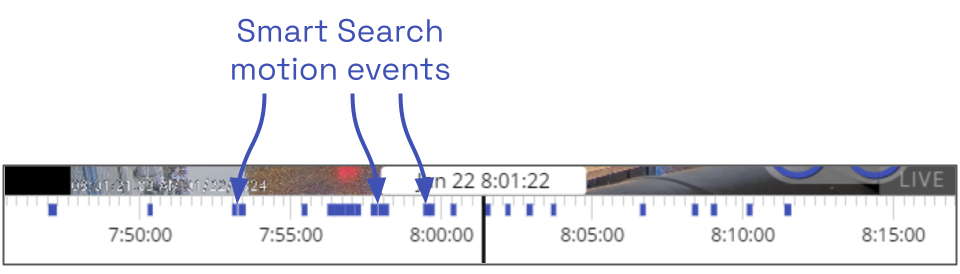
The Smart Search motion events (for motion that occurs within the motion filter region) will appear in blue along the top of the Timeline Bar. Refer to the About Motion Events section for additional details.
Post your comment on this topic.