
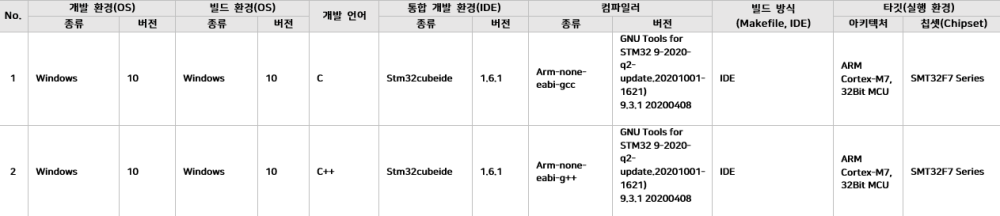
This document describes how to perform target testing using STM32cubeIDE for STM32 family targets.
The application example environment is as follows, and ST-Link debugger is used.
Target test application and execution order
1. Setting Target environment
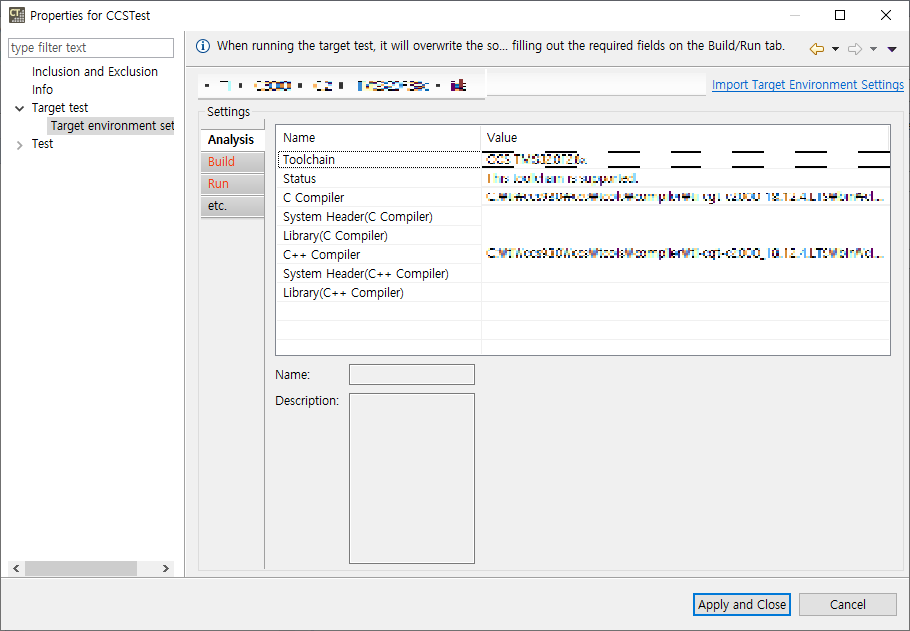
- On [right click on project] -> [properties] -> [Target test] -> [Target environment Setting], Just fill out the Property Analysis tab and close it after applying. The target test document is a manual build method, so other tabs do not affect the test.
2. Execute test case unit with [Run Target Test Case]
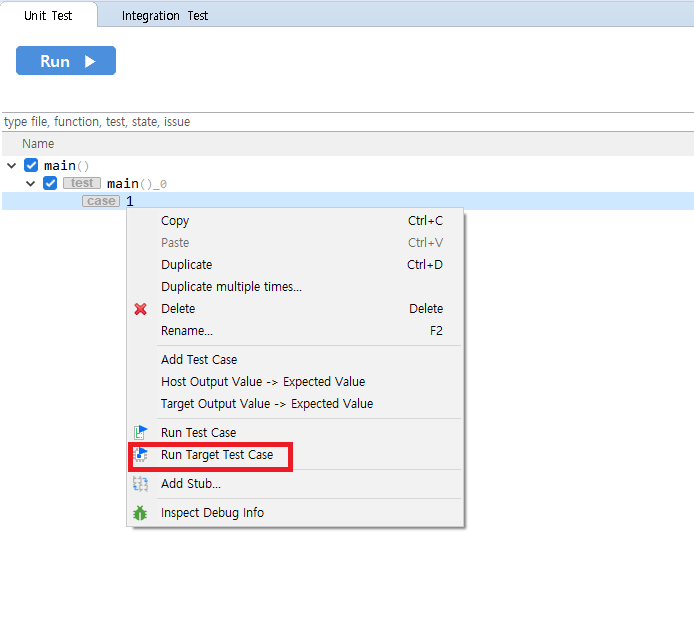
- For accurate testing, run them in test cases.
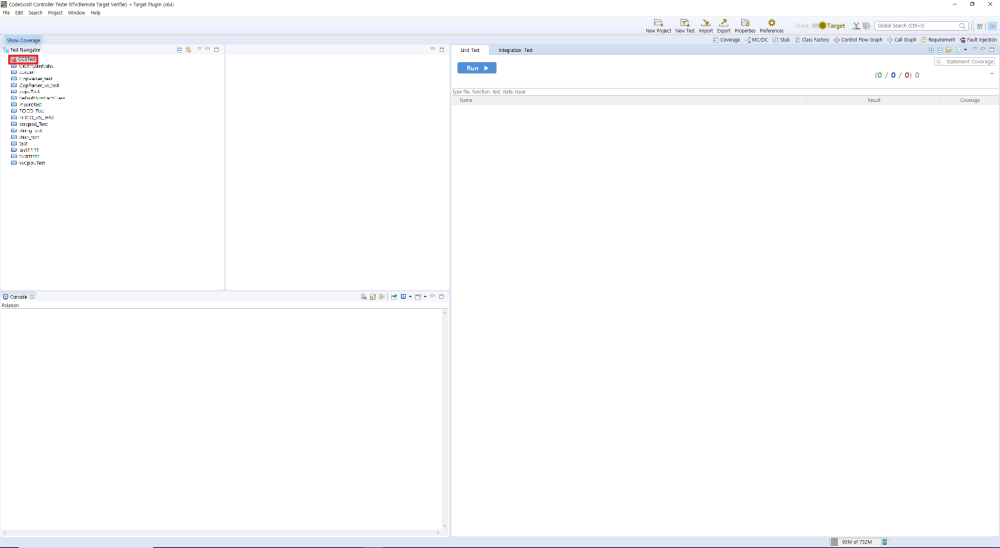
- If you go through steps 1 and 2, the project of CT 2023 will be locked as above.
3. Clean and build the project in STM32cubeIDE
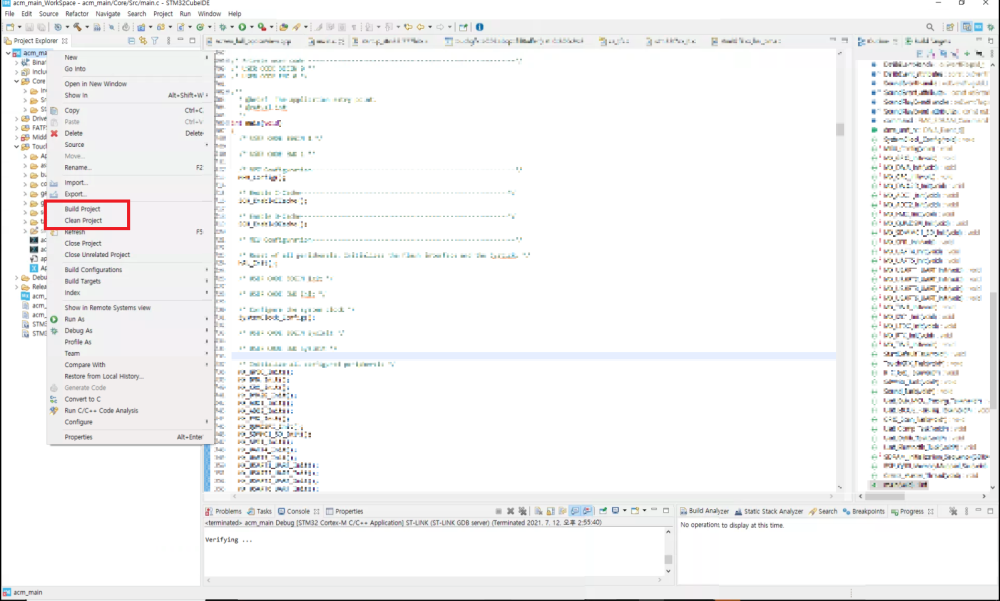
- Clean the exported source in STM32cubeIDE and build it.
4.Debug in STM32cubeIDE
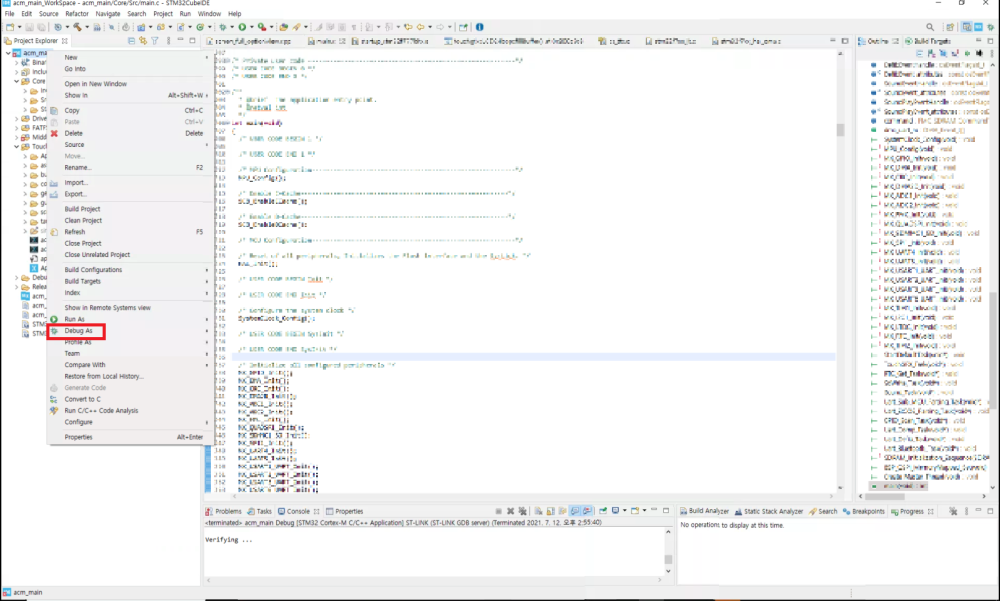
- If the build is successful, run debug.
5. Execute after setting a break point in return 0;
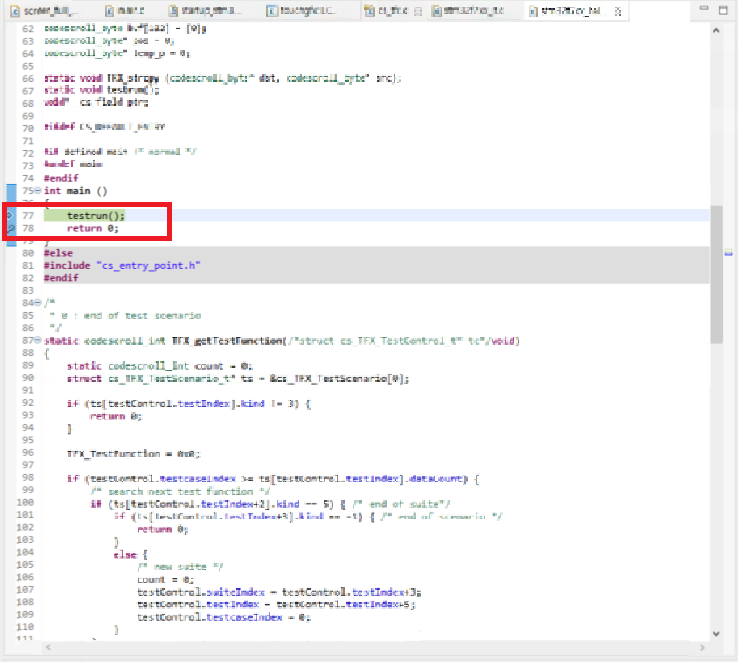
- The starting point of the code is main in cs_tfx.c. Put a break point before ‘return 0;’, which is the point at which testrun(); ends.
6. Check the log in the ct_target_log expression view
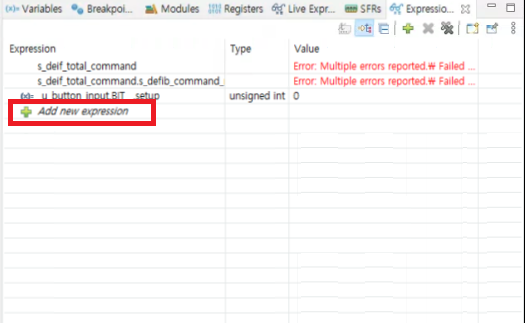
- In the expression view, click Add new expression to add an array containing the log (ct_target_log).

- You can check the contents of ct_target_log as above.
7. Check if it ends with CSET# (whether or not a normal test is performed)

- When the last part of the log ends with CSET#, it can be judged that the test ended normally. Therefore, you can check once whether the test is running normally in the expression view.
8. Add ct_target_log to monitor memory in memory view

- Add ct_target_log by clicking ‘+’ to Monitors in memory view for memory dump.

9. Export from memory view to log path of CT 2023 project / Check if the file is normally created in the path

- Click the export button in the memory view to download the memory of ct_target_log to a file.
- Format is RAW Binary, Start address is the start address of ct_target_log of expression view, and Length specifies the array size of ct_target_log. (Even if the length of the log is shorter than Length, it does not affect the test.)

- Check if the file is normally created in the specified path.
10. Restoring source file from CT 2023

- Restore the source file from CT 2023 to get the target test log.
11. Import Target Test Log -> Import from Log File

- Click [Import Target Test Log] -> [Import from Log File]

- Import the file created in step 9.

- You can confirm that the test case was successfully executed and the coverage was measured.
Need more help with this?
Don’t hesitate to contact us here.