
Sanctus Baking
All the materials have baking outputs to facilitate this process with the exception of a few materials that can’t be baked
When you select and right click a group node on the shader editor you will see a new option: “New maps from Sockets”

This will show you all the available output sockets, by selecting them they will be added to the Sanctus shader editor Panel (toggle with N)
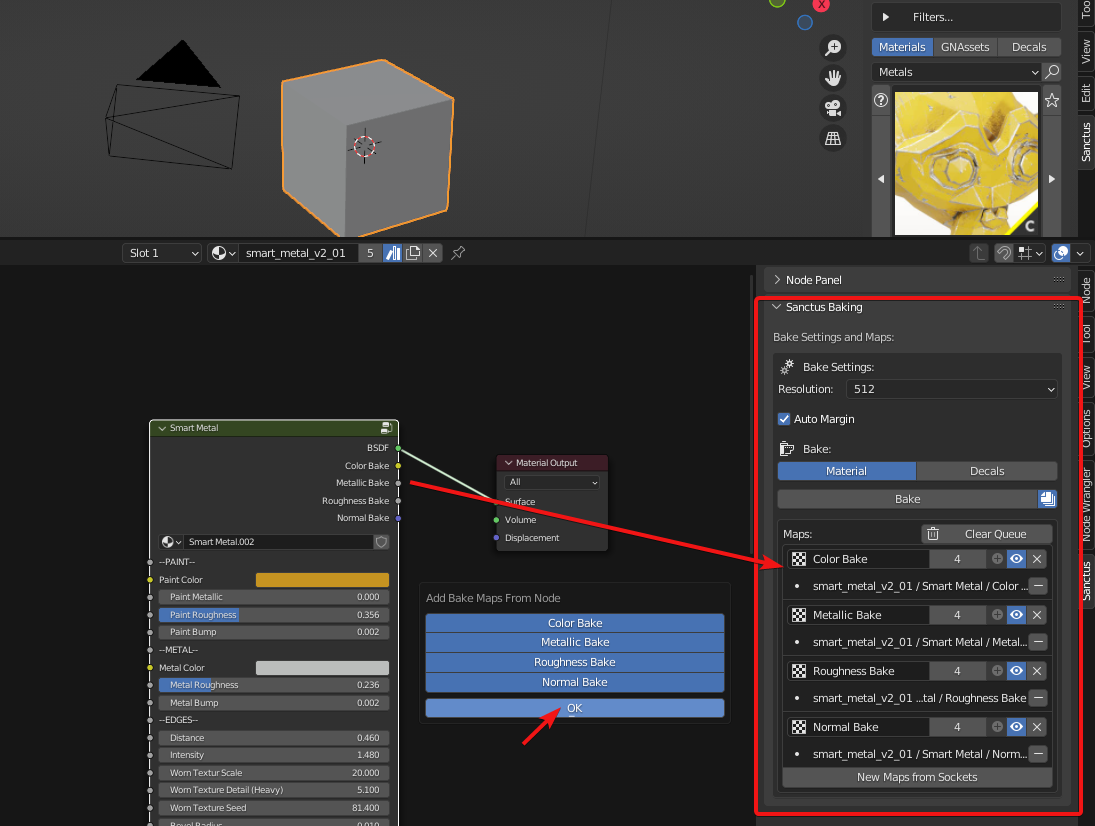
You can set the resolution of the textures you want to bake and also the samples for each map

Make sure that your object is selected and cycles is your render engine before baking or the bake button will be grayed out, once you click the Bake button it will change to “Baking” until it’s done.
Depending on the samples and the resolution this could take some time.
Once the baking is done, the button goes back to “bake” and you will see the bake result on the bottom of the panel:

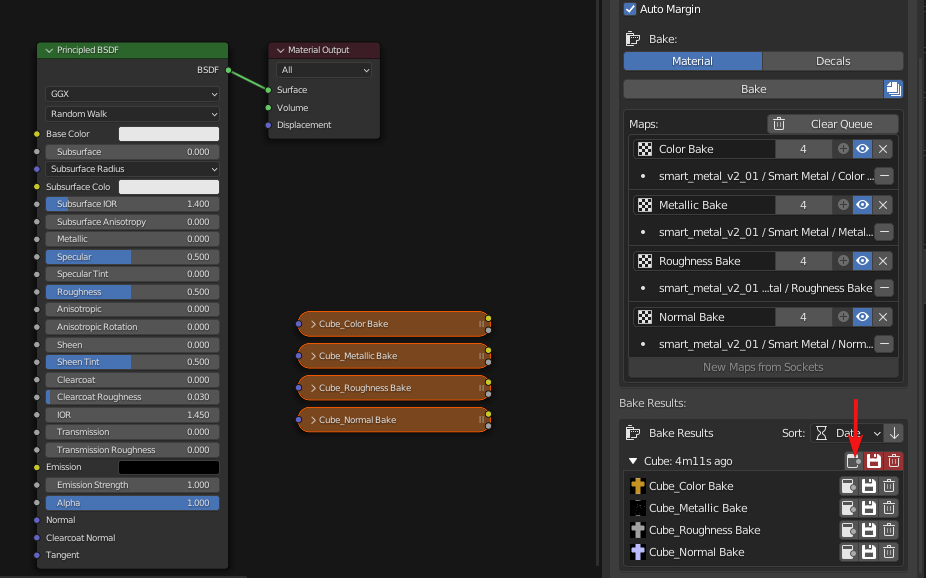
You can preview the bakes by clicking the thumbnails, and you can create a new material and use the Instantiate images button to add them to the shader editor:
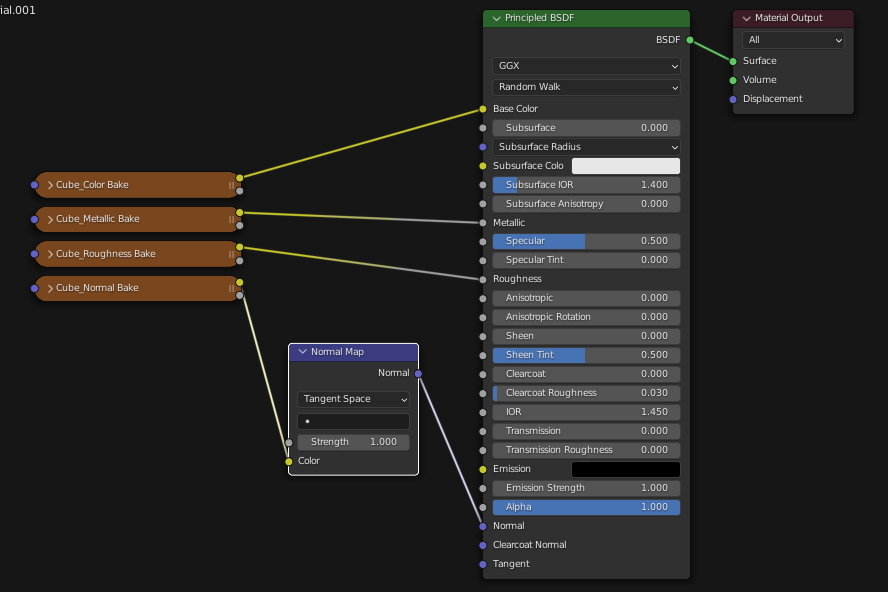
And now you can have a baked version of the procedural material:
Remember to save the images in your local drive, if you don’t use them in your blend file and they are not saved locally they will be deleted when blender restarts.
The panel UI

1. Texture resolution
2. Auto margin, uncheck to manually set it to a fixed pixel number
3. Material or Decal baking switch
4. Bake Button
6. Override Textures: if active, when you change baking settings and bake again, the textures are replaced, otherwise new instances are created.
7. Clear Queue: clears the baking queue
8. Map name: It will be created automatically but you can rename it here
9. The samples for each map
10. Remove socket from map bake (used when baking multiple slot materials)
11. Add bake sockets (used when baking multiple slot materials, you need to be on a different slot from the socket that is already added to be able to add another)
12. Disable map: you can hide maps instead of removing them to disable them from the batch bake
13. Remove Map
14. The sockets included in the map (you can have multiple sockets when working with materials with multiple slots)
15. New Maps from Sockets works the same way as right clicking the node or nodegroup you want to bake sockets from (a target node must be selected).
16. Bake results sorting: You can organize baked batches by Date or Name in ascending or descending order.
17. Baked batch textures (clicking a thumbnail will open the image)
18. In order: Add map to the shader editor, save map, delete map. There is a version of each button for the entire batch or for each individual map.
How to bake materials with multiple slots
Other uses
Even if this tool was made for the procedural materials of the library, you can use it to bake any output of any node. So you can use it to bake textures or other procedural materials as well.
Post your comment on this topic.
DKJ wrote: Mar 6, 2023
Magnifique! You have solved many important problems for me. I'm going to name my first-born child after you.
NightVision wrote: Aug 7, 2022
If you are like me, and you hate placing textures manually, you can use SimpleBake. It works perfectly with the Library using Cycle Mode (Haven't tried PBR mode yet)