
| |
This is the Add icon. |
In the event that Orchid Core VMS cannot auto-discover a camera, it can be added manually.
- At the Camera Configuration screen, press the Add Camera button to access the Register Cameras screen. Orchid Core VMS will open the Register Cameras screen in Auto mode.
- Select Manual mode.
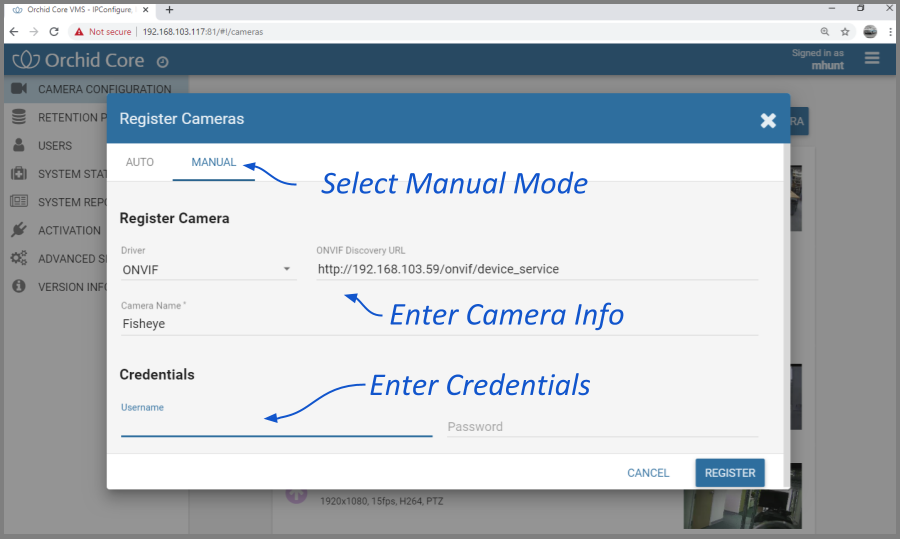
- Select the appropriate driver (ONVIF or RTSP) from the drop-down list.
- Enter the ONVIF Discovery URL, or the RTSP Stream URI (depending on the driver you specified) to match the correct address for the camera being added. Consult with the camera manufacturer’s user guide, as needed, for the correct syntax of the address.
- Enter a unique name for the camera. This will allow you to distinguish the camera from other cameras set up within Orchid Core VMS.
- Enter the username and password that is setup on the camera being added.
- Press the Register button to add the camera to Orchid Core VMS.
When complete, Orchid Core VMS will add the new camera to the list of registered cameras. If Orchid Core VMS fails to add a camera, an error message will appear explaining the issue.
- Once the camera has been added, you should review or edit the camera stream settings.
Post your comment on this topic.