
Overview
When you are ready to run a test phase leveraging the recording / learning capability in Testimony, you need to first prepare the source systems.
Process Steps
- Select Test Plan to use
- Generate Inbound RFC Capture – Prepares for inbound RFC calls to be captured. This is an optional step an only needed once per recording system and only if you will be recording RFC calls.
- Activate enhancements – Prepares the system for capture of all interactions.
- Execute Check Steps – Validation that the Source system is ready for recording
1. Select Test Plan from the drop down and click on the Tick. From there, you’ll need to click on the Enhancement Setup option within the Recording Section

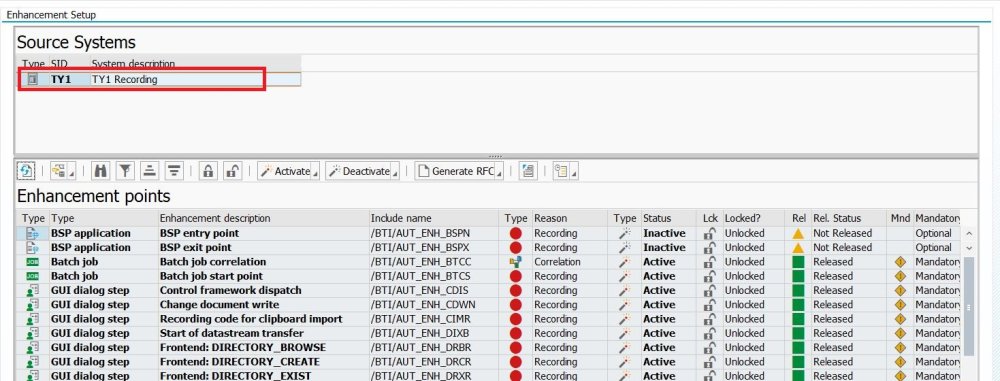
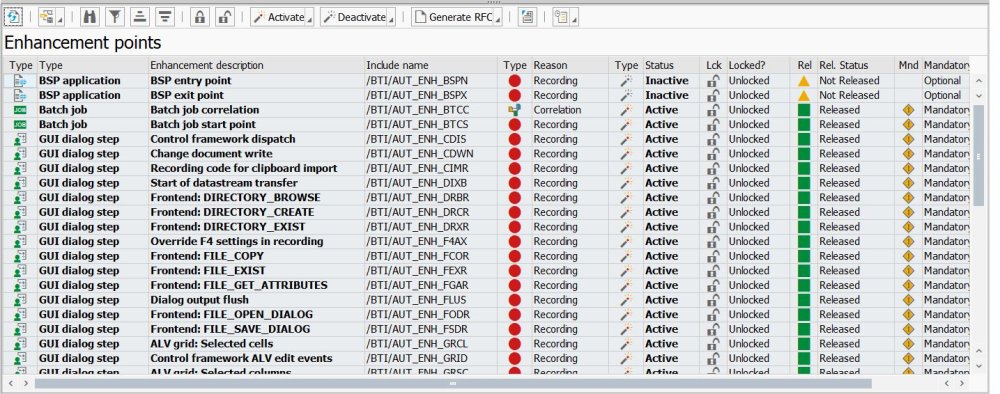
On the right panel, you’ll see your defined Source System(s). Double click on the system to show the Enhancement Points screen below
2. Generating the RFC Wrapper Programs – OPTIONAL
If you are planning on recording RFCs, then you will need to generate the RFC wrapper programs. These are small pieces of code that are executed before and after each RFC function module is called in order to capture the required information for the playback.
In the Enhancement Points section, click the button Generate RFC and select Parallel Processing -> Execute in Background.
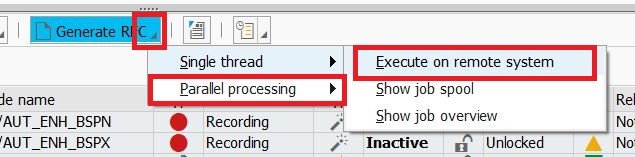
This will submit several background jobs in the source system which analyse each RFC-enabled function module and create a wrapper program for it. This can take an hour or more to run, so execute this step well in advance of the time at which you want to start your recording.
3. Activating recording enhancements
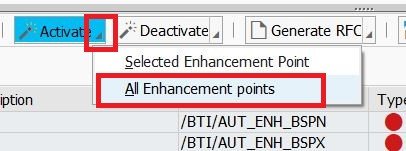
Testimony enhancements need to be activated in the source (recording) system before a recording can take place, but after the optional Generate RFC step is complete. If you are not already there, navigate to the Enhancement Setup section and click on the Source system. You should see a list of enhancement points and their current status (which should be Inactive). To activate the enhancements, click the Activate button and then choose “All Enhancement points”
You will be shown a pop-up giving information on the number of enhancements to be activated. Click on Proceed and after a few seconds the enhancements will be activated.
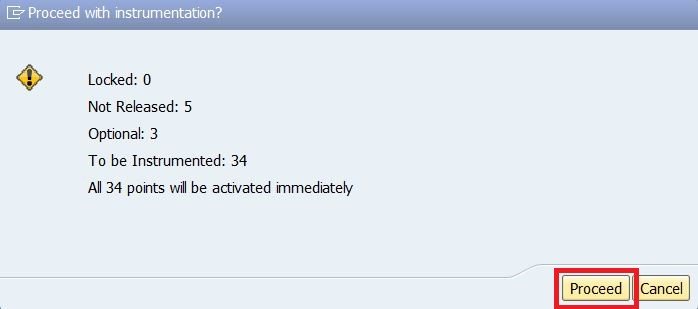
Note that some enhancement points (with Locked and/or Unreleased statuses) will not be activated.
4. Execute Check Steps
Once the enhancements are activated, you can execute the recording Check Steps
Select Recording -> Recording Status from the left-hand navigation pane.

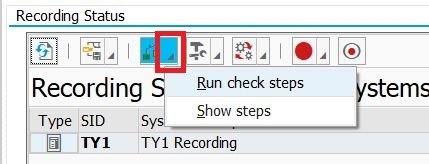
The Recording Status screen will appear on the right. Select the Source System and Click on the Check Steps button and choose “Run check steps”
Choose Yes in the following pop-up.

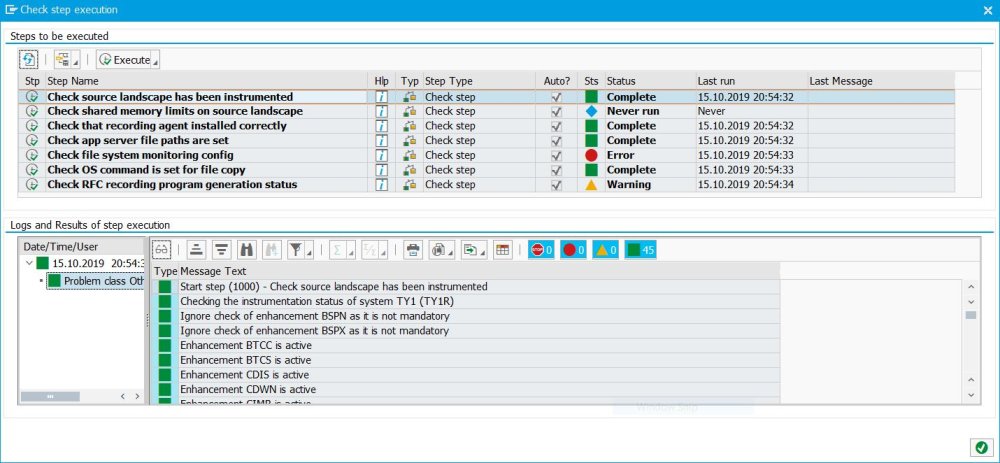
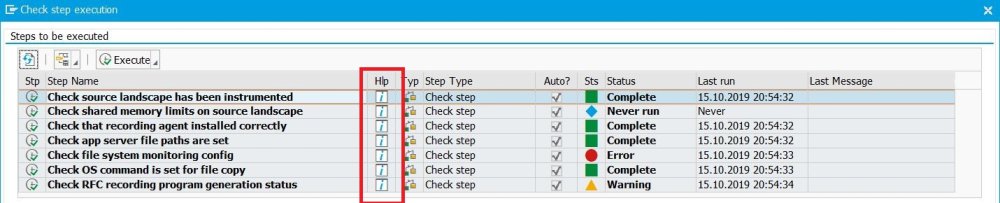
The check steps will run, and results will be returned in a pop-up screen, as below.
To help troubleshoot errors there are logs providing information on the error, double click on the line in error and then double click the log on the bottom left. The example below shows the error received if you do not active the Ehnancement Points in the Source system.
There is also help available to guide you in resolving any Check Step erros. Simply click on the blue help icon on the row in question.
You can also use the buttons below to hide the Information, Warning or Error messages if there are a large volume of messages to check.

Once you have finished analysing errors, close the pop-up screen and you can repeat the Check Steps as needed.
Post your comment on this topic.