
This section details how to install Social Squared for Microsoft® SharePoint® 2013/2016.
Installing Social Squared, consists of:
- Create one or more SQL Server databases.
- Install the Social Squared SharePoint® farm solution.
- Activate at least the Social Squared Forums site collection feature on one site collection.
- Within that site collection, configure each site with the Social Squared database that should be used by users of that site.
- Create and Manage Forum Groups and Forums.
- Add the Social Squared Web Parts to a page so that users can use Social Squared.
Creating a Social Squared SQL Server database
To create a Social Squared database, using the Lightning Tools wizard, complete the following steps:
- Logon to a server with the credentials that allows you to create an SQL Server database. See the Installation Planning.
- Unzip the downloaded Social-Squared-xxxx.zip file, which creates a folder, Social-Squared-xxxx, that contains a number of subfolders and files.
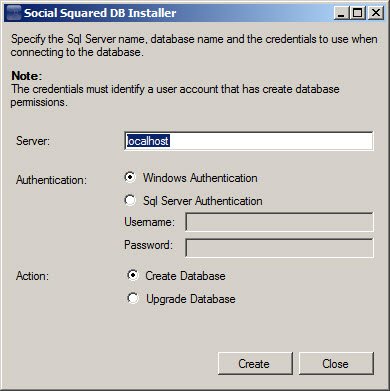
- Open the “Database Installer” subfolder and double-click SocialSquared.DatabaseInstaller.exe to open the Social Squared DB Installer dialog box. If prompted, click Run.
- In the Server text box, type the name of the server and SQL Server instance name, if applicable, where you want the Social Squared SQL Server® database to be created.
- Select one of the authentication radio buttons, and leave the Create Database radio button selected.
![]()
- Click Create to display the CreateDatabase dialog box.
- In the Database Name text box, type the name of the Social Squared database that you want to use, and then click OK.
- If successful, a message box will appear stating the database has been created. Click OK and then Close on the the Installer dialog box.
Installing the Social Squared SharePoint farm solution
The installation consists of the following SharePoint related steps. You will need to be a SharePoint server farm administrator to complete these steps:
- Upload the SocialSquared.SocialSquaredForum.wsp solution package to the SharePoint® farm.
- Deploy the solution to the required Web Applications.
- Activate the Social Squared 2013/2016 license key, if you are not using the trial version of the Web Part.
- Activate at least the Social Squared Forums site collection feature on the required site collections.
- Test the installation by adding a Social Squared Web Part to a page
From time to time Lightning Tools will provide an update for Social Squared. This is on average every 12 weeks.
Uploading the Social Squared SharePoint farm solution
To upload the SocialSquared.SocialSquaredForum.wsp to your Microsoft® SharePoint® server farm, complete the following steps using the Add-SPSolution Windows PowerShell® command:
- Unzip the downloaded Social Squared zip file to you computer.
- Copy SocialSquared.SocialSquaredForum.wsp to a folder on your SharePoint server, for example c:\Tools.
- Open the SharePoint 2013/2016 Management Shell and type on one line,
Add-SPSolution c:\Tools\SocialSquared.SocialSquaredForum.wsp
replacing c:\tools with the location where you stored the wsp file.
The solution has now been added to the solution store. Next deploy the solution.
Install and manage solutions for SharePoint 2013/2016 →
Go to top →
Deploying the Social Squared solution package
To deploy a Microsoft® SharePoint® farm solution to a Web Application you can use Windows PowerShell® commands or the SharePoint 2013 Central Administration web site.
The following instructions use the SharePoint Central Administration web site to deploy the farm solution.
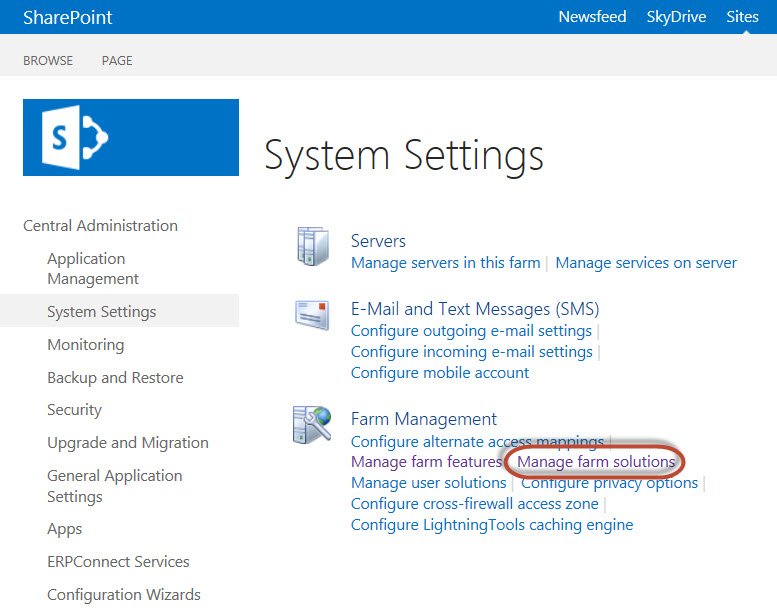
- In the browser, open Microsoft SharePoint Central Administration web site. On the Quick Launch click System Settings, and then under Farm Management, click Manage farm solutions.
![]()
- On the Solution Management page, click SocialSquaredForum.SocialSquared.wsp.
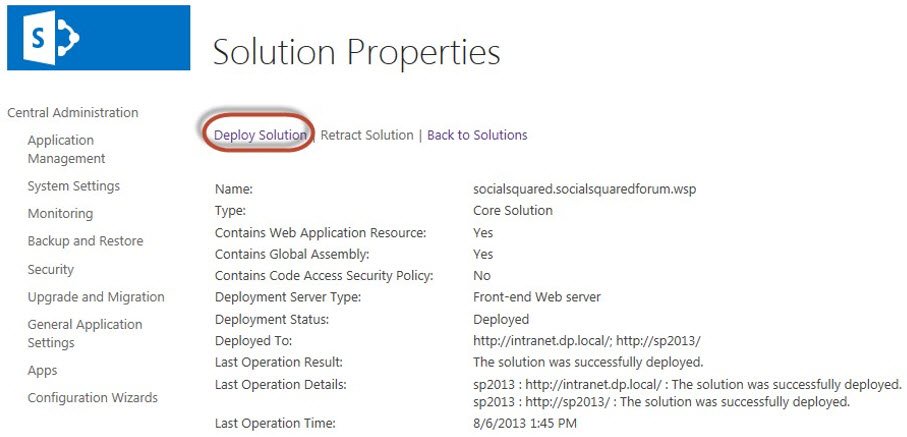
- On the Solution Properties page, click Deploy Solution.
![]()
- On the Deploy Solution page, in the Deploy To? section, in the dropdown list select the Web application where you want to deploy the solution or select All content Web applications if you want to use the Social Squared in all sites in all Web applications.
- Click OK
Post your comment on this topic.