
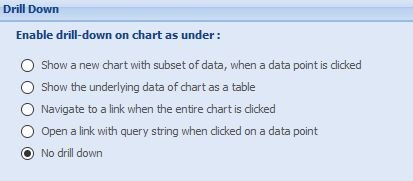
The drilldown option allows the main chart to serve as a summary of all of the data being presented and then for the users to view more detail about specific areas by clicking on dataplots. The drilldown function can be enabled in four different ways which shall be detailed below.
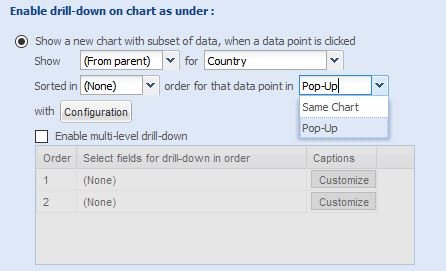
Show a new chart with subset of data, when a data point is clicked
In order to use this drill down setting you must be using a chart which is using data grouping. This setting allows users to select a dataplot on in the chart to view more detail of the grouped data.
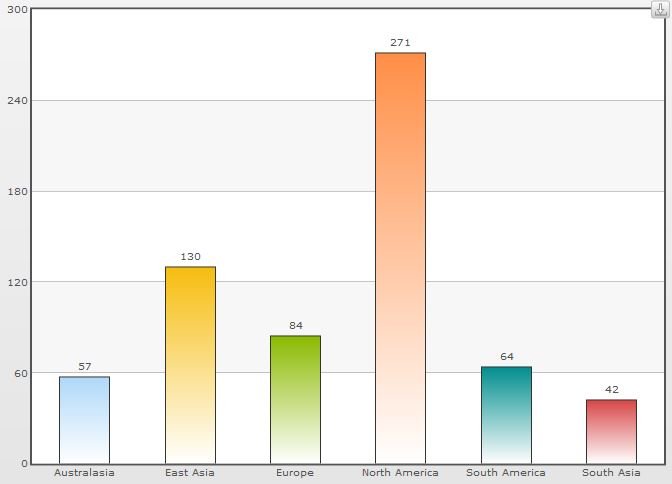
So for example we can have the initial dataset for the number of orders made, grouped by the region of the world that they were made in to produce a chart looking like the one below.
Then from there we can drill down into the regions to see the number of orders for individual countries, producing a secondary chart like that shown below.
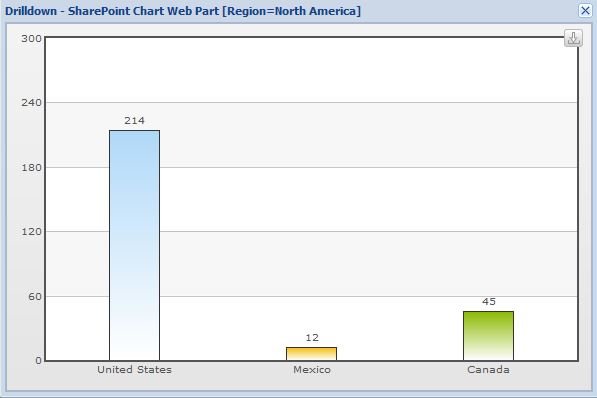
This allows for the original chart to give a concise and quick to understand overview of the data, while still allowing the finer details to be viewed in the same place.
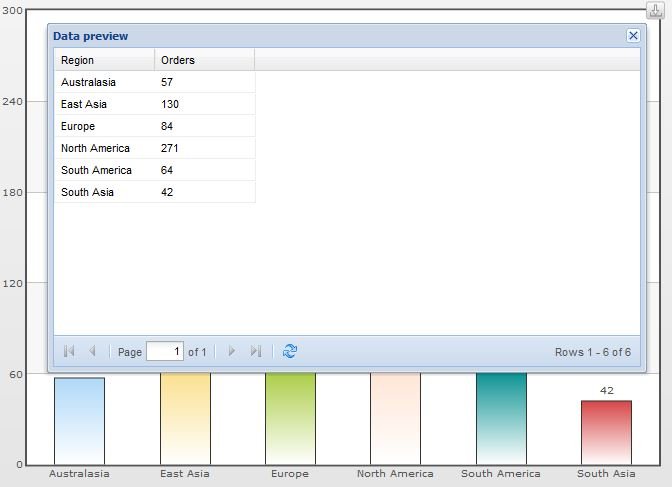
Show the underlying data of chart as a table
When this setting is selected and a user clicks on the chart, the underlying data that is used to build the chart is displayed in a table.
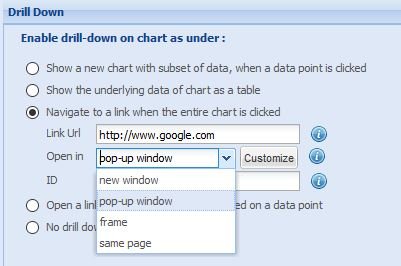
Navigate to a link when the entire chart is clicked
When this setting is selected and a user clicks on the chart they are linked to a web page. You can choose the type of page to link to and whether it shall be opened in a new window, pop-up window, frame or on the same page.
If you choose for the new link to be opened in a pop-up window then you can configure the settings for the pop-up.
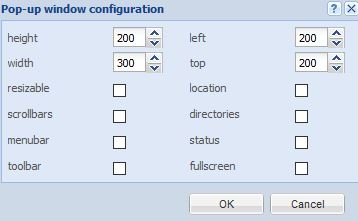
The following settings can be configured for the pop-up window:
- height and width can have their value in pixels set either by typing in the values or using the up and down arrows provided.
- The left and top values are used to define how many pixels from the left and top edges of the screen the pop-up should appear.
- The resizeable check-box determines whether users are allowed to manually resize the pop-up.
- The scrollbars check-box determines whether scrollbars are shown if the web page loaded is larger than the pop-up’s pixel constraints.
- The menubar check-box is used to decide whether a menu bar is displayed at the top of the pop-up when the ‘Alt’ key is pressed.
- The toolbar check-box determines whether the main toolbar containing the back, forward and stop buttons is included in the pop-up.
- The location check-box determines whether the pop-up window has an address bar.
- directories determines whether additional toolbars such as the links bar in Internet Explorer is displayed in the pop-up or not.
- The status check-box is used to determine whether a status bar is displayed at the bottom of the pop-up.
- The fullscreen check-box determines whether the pop-up opens in full-screen mode.
Post your comment on this topic.