
Some internal Microsoft® SharePoint® lists and libraries, such, Tasks, Contracts and Calendar; can connect to Microsoft Outlook®. When the Offline Client Availability radio button is selected on the list’s Advanced Settings page, the data within that list can be stored locally on a users computer, so that the user can use that data when they are away from the office and do not have connection to the SharePoint web site.
External lists can benefit from the same behaviour, if they contain the required columns and you have configure the external content type correctly. This walkthrough demonstrates how to configure the Office Item Type settings for an external content type, and then how to map the external data fields to Office Item Types.
The walkthrough uses BCS Meta Man for Windows with Microsoft® SharePoint® Server 2013, Microsoft Outlook 2013 and a Microsoft® SQL Server® data source, however you could use any other data source supported by BCS Meta Man for Windows, and should the step should be very similar if you are using SharePoint Online with Office 365™, Microsoft SharePoint® Server 2010 and Microsoft Outlook® 2010. If you have any questions please submit them on our web site page: Support Request.
This walkthrough demonstrates the following tasks:
- Creating an external content types.
- Configure Office Item Type mappings.
- Deploy the BDC Model.
- Create an External List based on your BDC model.
- Activate the Offline Synchronization for External Lists site feature..
- Connect to Outlook.
Prerequisites
You need the following components to complete this walkthrough:
- SharePoint Server 2013
- BCS Meta Man – it doesn’t necessarily need to be installed on the SharePoint server but it requires .NET Framework 4.5 installed on the machine where you are using BCS Meta Man.
- Microsoft® SQL Server® with any database. This walkthrough uses the NorthWind sample database.
- A table in the SQL database with contact information that will be synced with Outlook. This walkthrough uses the Employees table.
- Microsoft Outlook 2013 .
Create
This walkthrough requires one external content types for the Employees table. Create the external content type (ECT), by completing the following tasks:
- Start BCS Meta Man.
- Under data source, click Microsoft SQL Server.
- Enter the necessary details. More information can be found in the Connecting to SQL Server section in this documentation.
- Click the blue arrow
 to move to the next step.
![]()
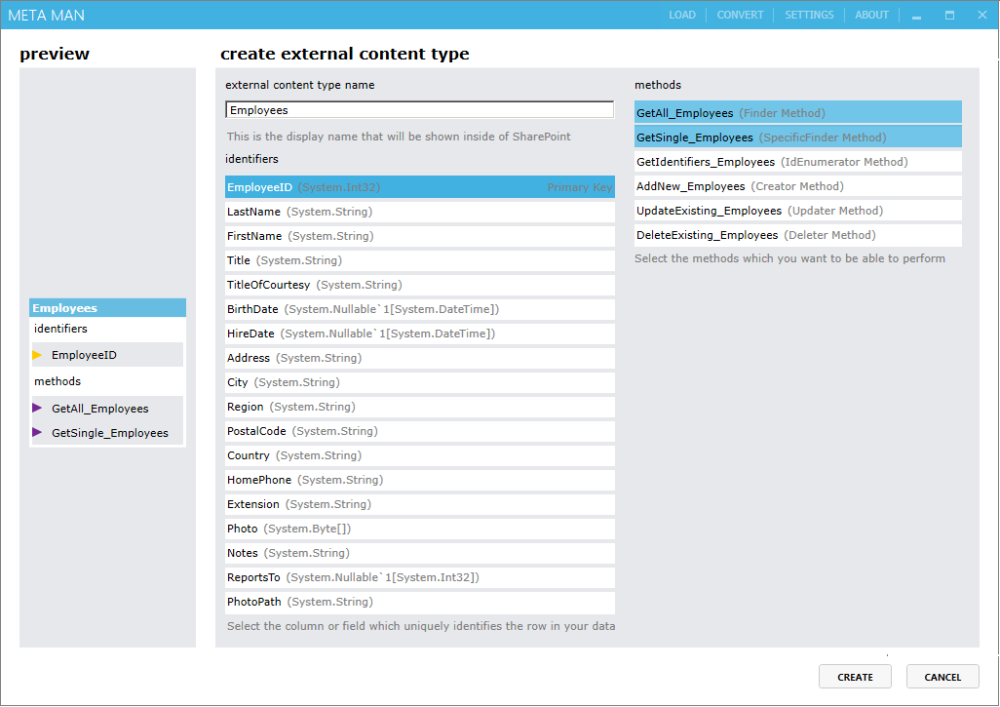
BCS Meta Man connects to the SQL server, and then displays the model diagram page. - Click Tables to display all the tables in your SQL Server database.

- Drag and drop the Territories table onto the model diagram design area.

BCS Meta Man again connects to the data source and displays a preview of the external content type. You may modify the external content type name, change identifier and add or delete methods to the external content type. In this walkthrough we leave selected all default values. - Click Create.
![]()
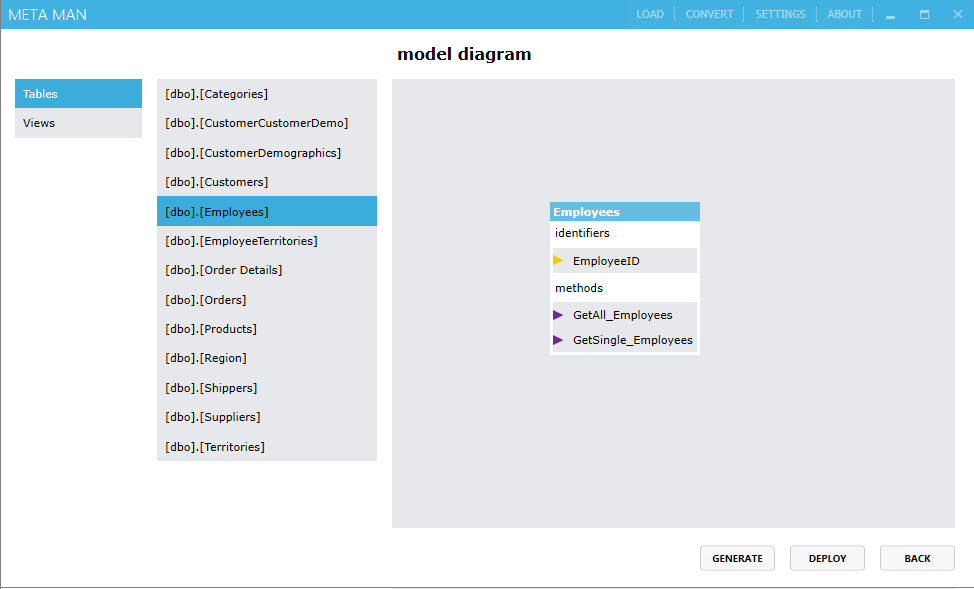
The external content type is displayed on the model diagram design surface.![]()
 to move to the next step.
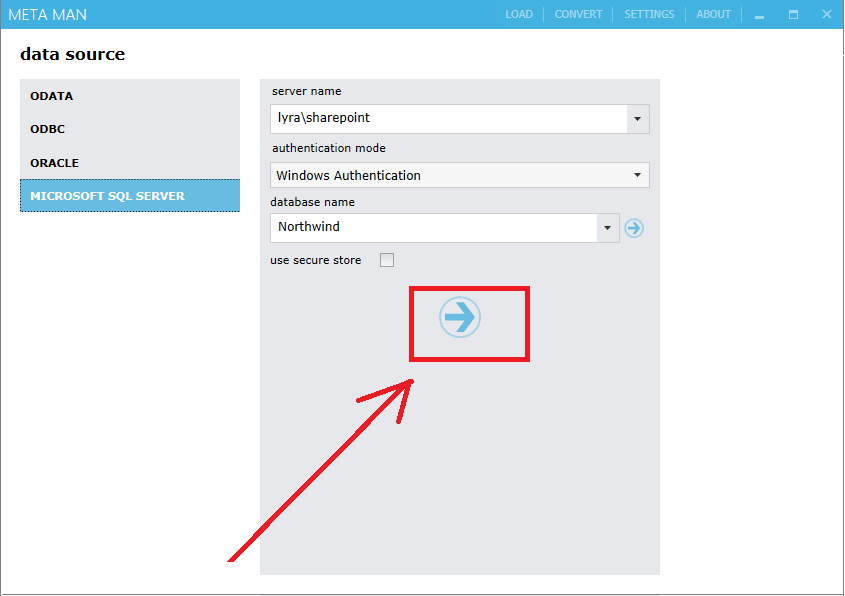


Configure Office Item Type mappings
- Within the BDC model design area, right-click the Employees external content type, and then click Configure Entity.

Tip: More information on modifying an external content type can be found earlier in the documentation.
The configuration screen is displayed. - In the general settings area, under office item type, select contact.

- Under configuration, click methods.

The methods screen is displayed. - On the methods screen:


- Under methods, select the Finder Method, if not already selected. When any field is selected, a warning is displayed, stating that some fields need to be mapped to Office Properties.

- Under fields, select the Title field, in the office item type mapping list, select Title and then click Save.

- Repeat the previous step to complete the following mappings:
field office item type mapping FirstName First Name LastName Last Name Address HomeAddress HomePhone Home Telephone Number


Deploy the BDC Model
- On the title bar, click Settings.

- In the Model deployment URL text box, type the URL of the SharePoint 2013 Central Administration web site.

- Click Save to close the Settings dialog box.

- Click Deploy.
SharePoint validates your BDC model, and then the Information dialog box is displayed.
- Click OK.


Create an External List based on your BDC model
- Navigate to a SharePoint site where you want to test that you have correcting configured the External Item Picker.
- Click Settings, Site Contents and then on the Site Contents page, click add an app.

- Click External List, you may need to scroll down the page or page the second page.
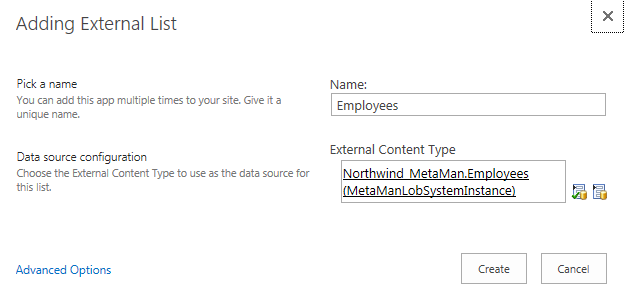
The Adding External List page is displayed.
- In the Name text box, type the name for your list.
- To the right of the External Content Type text box, click the External Content Type picker
 .
.
The External Content Type Picker page is displayed. - Select the ECT that represents the Employees table, that you generated in this walkthrough.

- Click OK, to return to the Adding External List page.
![]()
- Click Create.
The external data from your SQL Server database is displayed in the External List.


 .
.


Enable Offline Synchronization for External Lists
- Click the Settings
 , and then click Site settings.
![]()
- On the Site Settings page, under Site Actions, click Manage site features.
- On the Site Features page, to the right of Offline Synchronization for External Lists click Activate.
The page will refresh and the feature is identified as being Active.
 , and then click Site settings.
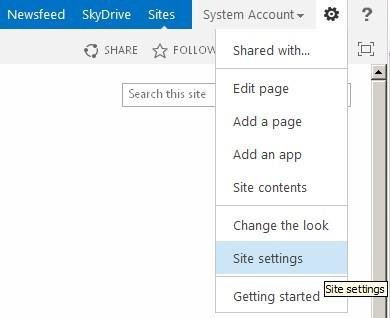

Connect to Outlook.
- Navigate back to the External List you created previously.
- On the List Ribbon tab, click Connect to Outlook.
Tip: If the Connect to Outlook button is not active, fresh (F5) the page.
A dialog box is displayed stating, Publisher cannot be verified.
- Click Install.
A dialog box is displayed stating, The Microsoft Office customization was successfully installed.
- Click Close.
- Open Outlook, if it is not already open. You should see a link to the Employees contacts list.

- Click on the Employees list, to display the contents of the external list.

Tip: To view all the fields of the employee external content type, click an employee and then on the Contact Ribbon tab, click the Customer Details. The fields of the employee are displayed on a separate Outlook form. This form only displays the fields that were mapped to the Contacts Office Item Type properties. Or you can create a custom view, as described in the topic, How to: View All the Fields in an External List in Outlook Explorer.


Post your comment on this topic.